BLOG

STEAM Innovation Lab Celebrates 10 Years
When the Children’s Museum of New Hampshire opened its S.T.E.A.M. Innovation Lab a decade ago on March 18, 2016, the space was designed to support and engage New Hampshire’s future innovators. Now, ten years later, the museum has welcomed hundreds of thousands of...
Family Light Night To Benefit New Exhibit at Children’s Museum of NH
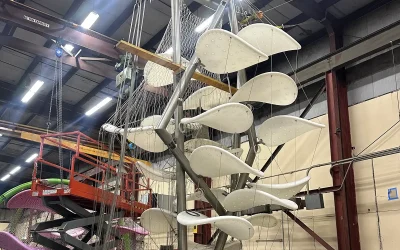
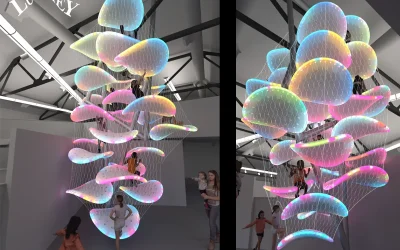
The Children's Museum of New Hampshire is hosting a special fundraiser on Saturday, March 7, 5:30-7:30pm called "Family Light Night", to raise funds to help support the creation and installation of a unique "Luckey Climber"—a 30-foot tall climbing sculpture featuring...

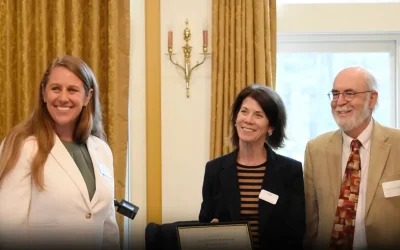
Director of the Children’s Museum of New Hampshire Honored with Community Arts Champion of 2026 Award
Dover, NH (Friday, February 13) – The Director of the non-profit Children’s Museum of New Hampshire, Jane Bard, was honored by the Greater Dover Chamber of Commerce with their 2026 Community Arts Champion Award. Jane was nominated by the Dover Arts Commission, and...
Expanding Play-Based Learning in 2026
The Children’s Museum of New Hampshire (CMNH) is excited to share that they have been awarded two grants this month to support the expansion of their Play-Based Learning educational outreach programming. A grant from the Dobles Foundation has been awarded to fund...
CMNH Receives Generous Grant from the Evelyn S. and K.E. Barrett Foundation
The Children’s Museum of New Hampshire (CMNH) is excited to share that they have been awarded a grant for $75,000 from the Evelyn S. and K.E. Barrett Foundation to support the creation and installation of a Luckey Climber exhibit. A Luckey Climber is a visually...
Grant to Help Refurbish One World Multicultural Exhibits
The Roger R. and Theresa S. Thompson Endowment Fund announces the awarding of $123,000 in grants to six non-profit organizations in New Hampshire and Maine: Berwick Academy, Children’s Museum of NH, Pine Tree Society, Crotched Mountain Rehabilitation Center, Future In...
CMNH Seeks Business Support for New Climber
The Children’s Museum of New Hampshire (CMNH) is excited to announce their newest planned exhibit, a Luckey Climber, coming in the fall of 2026. A Luckey Climber is a visually stunning, large-scale climbing structure that combines art, architecture, and play. “The...

Back to School Reads
There's no better way to wind down and prepare for a new season of learning and discovery than with a good book! Here at the Children's Museum of New Hampshire, our Education Staff are passionate about sparking curiosity through play and, of course, through reading!...
Children’s Museum of NH Receives CDFA Tax Credits
The Children’s Museum of New Hampshire (CMNH) is excited to share that they have been awarded $200,000 in Tax Credits from the New Hampshire Community Development Finance Authority (CDFA). On June 17th, CDFA awarded 21 nonprofits a total of $6.6 million in tax credit...

CMNH is a 2025 Blue Star Museum
CMNH to offer free admission to military personnel and their families this summer The Children's Museum of New Hampshire in Dover joins museums nationwide in the Blue Star Museums initiative, a program that provides free admission to currently serving U.S. military...