The Museum Blog
Category: Junior Science
Science Magic: Dancing Popcorn!
by Meredith Brustlin, CMNH Educator
We had a great response to our last science magic video (Plastic Bag Polymers!) so decided to share another!
Dancing Popcorn Magic
Materials Needed:
- Clear plastic cup/tall container or clear glass cup/jar
- White vinegar
- Baking soda
- Unpopped popcorn
- A spoon
Directions (prep):
- Fill your clear container about ½ way with water
- Put vinegar in a smaller cup
- Put baking soda in a small cup with the spoon
- Place unpopped popcorn in another small bowl
Directions (activity):
- Tell your young scientists that today you are going to make some popcorn DANCE using science!
- Invite them to put a few spoonfuls of baking soda in the cup of water and stir until it has fully dissolved
- Add a couple spoonfuls of popcorn to the baking soda mixture. Is it dancing yet?
- Make a hypothesis--what will happen when we add the vinegar?
- Carefully & slowly add the vinegar to the baking soda solution
- What happens?!
- You will notice that the popcorn starts to DANCE!
The Science:
- This science magic is created using a simple chemical reaction. When we add vinegar & baking soda together--we create carbon dioxide.
- You can see this at work! If you watch the popcorn carefully, you’ll notice that it gets covered in little bubbles and it bobs up and down.
- Those bubbles are made of carbon dioxide. As they collect on the popcorn, it lifts the popcorn up to the top of the container. Once it is at the top, some of those bubbles “pop” and bring the popcorn back down again.
- This up and down motion is what makes the popcorn look like it is dancing!
Shiny Penny Experiment
By Colie Haahr, CMNH Educator
We were surprised by how excited kids got about cleaning pennies when we offered this experiment as a drop in STEAM activity at CMNH! It does seem like a magic trick when you first see the pennies getting shinier almost instantly.
This experiment is a good way to practice making predictions and observations, and it’s an easy one to do with materials that are available at home! For kids learning about money and currency, this is a great way to practice counting and recognizing the different coins as well.
Materials:
- Table cover of some kind (a trash bag works!)
- Several pennies
- Other coins- quarter, nickel, dime, coins from other countries if available
- Vinegar
- Salt
- Bowl of water
- Bowl for vinegar and salt mixture
- Q-tips
- Paper towels
- Optional: lemon juice, soapy water, other liquids you would like to experiment with
Directions:
- One way to set this experiment up is to use a muffin tin or small bowls to offer several different liquids for kids to try. A small pallet for paint works well, too!
- Put the coins on a surface you do not mind getting messy- plastic plate, paper towel, or directly on the table covering, but you will want some paper towels or dish towels nearby
- Allow kids to experiment with the materials to see what would work best to clean the different coins by dipping the coins in the liquid, and brushing them with a q-tip
- Ask what they think will work best, and why?
- After some experimentation, guide them toward the vinegar or lemon juice mixed with salt. The salt works as a mild abrasive, and the acid in the vinegar and lemon juice react with the pennies to make them shiny and new looking
- Important: rinse the pennies in water after cleaning them if you would like to keep them nice and shiny! They will oxidize and turn green otherwise.
- Fun fact: this is what happened to the statue of liberty, and why it looks green today! Kids did not dip it into a bowl of vinegar, but the statue is copper, and it turned green because of oxidation over time.
- Ask why the acidic liquids cleaned the pennies, but not the other coins? What is different about them? The pennies are a different color because they are made of a different material: copper!
What’s Happening?
Pennies are made of copper, and copper is shiny, but over time it becomes tarnished and appears black or brown because of copper oxide, which is created when copper bonds with oxygen. Acids mixed with salt help break down the copper oxide on the penny. Vinegar may remove actual dirt from the pennies and other coins because it works well as a cleaner!
Extensions:
Science Bob offers a few more experiments you can try using the same materials.
Scientific American offers some ideas for different liquids to use, and a more in depth explanation and method for advanced experiment-ers.
Learning About Symmetry
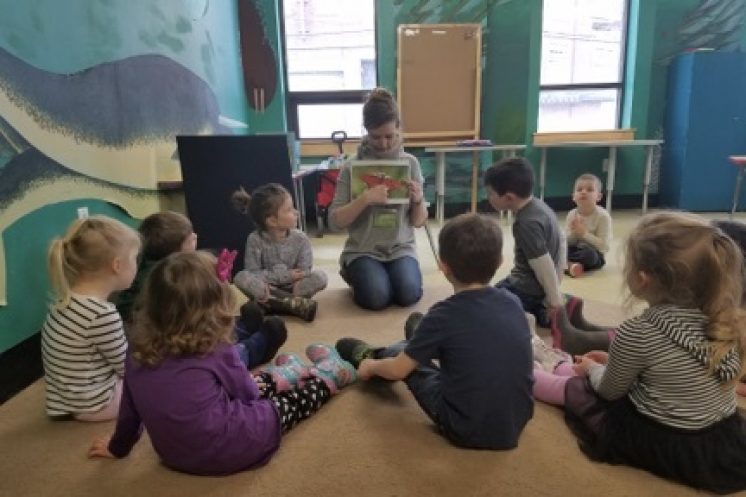
The Children’s Museum of New Hampshire’s Monday science class offered a group of eleven 3-5 year olds a chance to learn and apply the concept of symmetry.
The museum’s Early Childhood and Literacy Coordinator, Meredith Brustlin led the Junior Science Explorers class, offered by the museum on Mondays from 1:30 to 2:15pm.
Meredith first gathered the group together and explained the concept of symmetry using images of butterflies, lions, and houses. Kids were challenged to identify which images displayed symmetry and which did not.
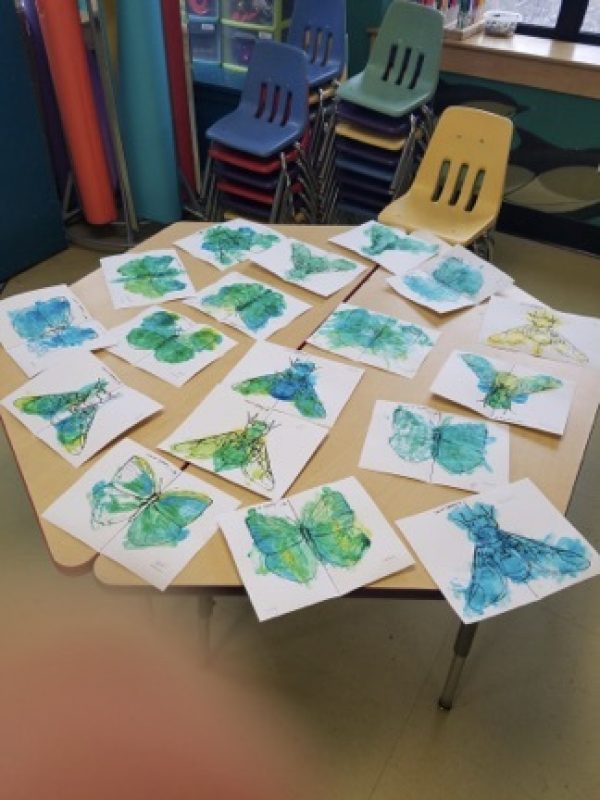
Following the lesson, the group sat down to a hands-on symmetry activity, allowing them to apply what they had just learned. The kids were given the choice of painting one side of either a butterfly or a bee.
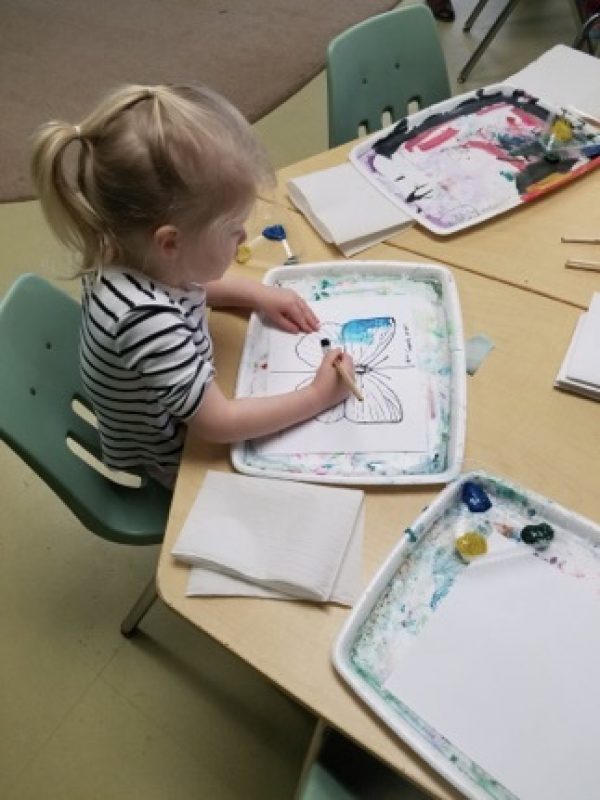
They were then instructed to fold their papers in half, revealing a symmetrical work of art they were free to take home.
Monday Science Classes Offer a Bonus!
The Children’s Museum of New Hampshire in downtown Dover offers a variety of weekday science classes for preschoolers, as well as homeschoolers but is now offering parents an added bonus during a Monday science class.
The museum’s popular Junior Science Explorers class for kids ages 3.5-5 is now being offered on Mondays, a day the museum is closed to the public. Families who have a museum membership can not only sign up their kids for the class, but any younger siblings can now join parents on the 2nd floor of the museum to play in the exhibits while their older siblings are in class. This is a benefit that’s exclusive to museum members and is only offered while the Monday class is in session.
This November’s Junior Science class theme is “Incredible Animals” and will invite junior scientists to explore habitats, animal tracks, survival techniques and more. The class runs Mondays, November 6 through December 11 from 1:30-2:15pm.
These 45-minute structured science classes are $60 for Members and $70 for Non-members. Pre-registration is required. Call 603-742-2002 to register.
Junior Science: Water
 By Meredith Lamothe
Welcome to the Junior Science Explorers blog!
We will share here some of the projects, experiments and concepts that we explore in the Junior Science classes, which are designed for ages 3.5-5.
Keep learning, Keep exploring.
JUNIOR SCIENCE: Water!
Water is amazing. Everything that is alive depends on water. Water can exist in THREE different states. Some things float in water, while other sink. There's so much to learn and experiment with when it comes to water.
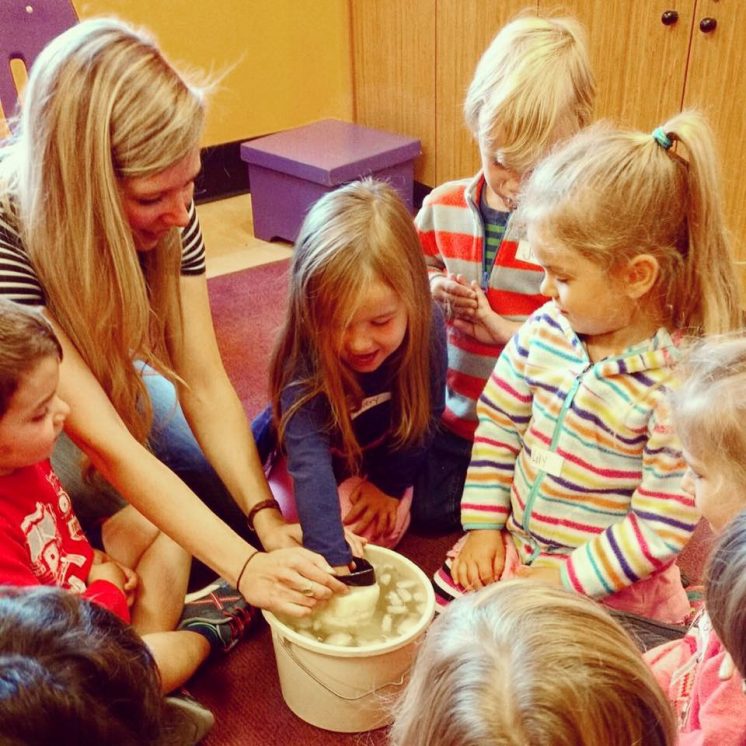
SINK OR FLOAT?
During class, we filled our sensory table with water and then each student chose items to place in the water. There were lots of items to choose from. We gently placed them into the water and saw if they sank or floated. We asked ourselves "What are the forces at work here?" The first was gravity—a cork falls to the ground when it is outside the water because of gravity, but stays afloat in the water because of another force–buoyancy! You can remember buoyancy by calling it “bouncy buoyancy” (say that five times fast). Buoyancy keeps things afloat or "bouncing" on the water.
EVAPORATION
The River Model in our Cochecosystem exhibit is a perfect place to talk about evaporation. You can visit any river, lake, pond or even a puddle to talk about how water evaporates thanks to the Sun and wind.
DENSITY
The concept of density goes well with the Sink or Float experiment. You can make glitter bottles to show that the water and the glitter have the same density, which is why the glitter stays afloat when the bottle is twirled.
SCIENCE STORYTIME
Fluffy and Baron by Laura Rankin is a great story to use to talk about how ducks float in the water and therefore have buoyancy.
Science Art
Junior Science: Ages 3.5-5
By Meredith Lamothe
Hello Science Families!
We’re halfway done with this session of science–I say it every time, but it always surprises me when we get to this point!
Today was all about opposites in junior science class!
We specifically focused on BLACK and WHITE! It was fun to talk about alllllll the many colors that we’ve learned about and all the shapes and then to step back and look at something as simple as black and white.
We talked about how black and white are opposites and some other things that are opposite (UP and DOWN, Smooth and Bumpy, Left and Right, Open and Close!)
ACTIVITY #1: Floating Crayons
Then it was onto our first experiment! We explored crayons! We wanted to see if a bunch of crayons on our trays would SINK or FLOAT (opposites!) We dropped in crayons–which made a great splash sound!–and then observed what they did. We noticed something very odd. All of our crayons were sinking EXCEPT our black crayons! Those floated!
We learned that black crayons float because the pigment used to make the black color isn’t as heavy as the pigments used to make the other color crayons.
Then we tried to see if there was anything on our table that might help the other crayons float. We couldn’t find any floaties or pool noodles–but we did see some salt. What would happen if we added salt to our water? WE tried it! After we added a whoooooole bunch of salt, all of our crayons started to float! We learned that this was because we were changing the density of the water and making it a lot easier for the crayons to float–just like it’s easier for us to float in the salt water of the ocean!
ACTIVITY #2: Black and White Process Art
Our next activity was experimenting with black and white paints. We started by using a little brush and trying out some black paint. Then we used a BIG brush and added some white paint. Those become gray! We kept experimenting, added some collage pieces, and just paint, paint painted!
 (This photo is from Pinterest, but our paintings used the same idea!)
Our paintings were still veeeery damp at the end of class, so we’ll have to take them home next week–they’re looking more and more interesting as they dry!
See you next week!
Best,
Meredith