The Museum Blog
Category: Art
Wacky Art: Windsock Craft
By Meredith Brustlin, CMNH Educator
I love this windsock craft! It’s an art project that is accessible to all ages and abilities - and you get to sneak in a little bit of science. Here’s how to make your own windsock:
Materials Needed:
- Paper (printer paper, cardstock, construction paper, etc)
- Markers or crayons
- Crepe paper streamers or tissue paper cut into long strips
- Tape or glue
- A stapler
- A hole punch or scissors
- String or yarn
Directions:
- Invite little ones to decorate their piece of paper with the markers or crayons. If you have stickers or stamps, you could use those, too!
- Once their paper is all decorated, flip it over so that you are looking at the back
- Tape or glue the streamers onto the bottom end of the paper
- If you used glue, give it a few minutes to dry
- Pick up the paper and curl it into a tube/windsock shape
- Staple on the top and the bottom
- Hole punch or cut small holes on either side of the top
- Put your string through the holes
- Hang up your windsock!
The Science:
- The science behind windsocks is pretty simple...if you put your windsock outside, you’ll be able to tell a few things:
- If the wind is blowing
- How much the wind is blowing
- Which direction the wind is coming from!
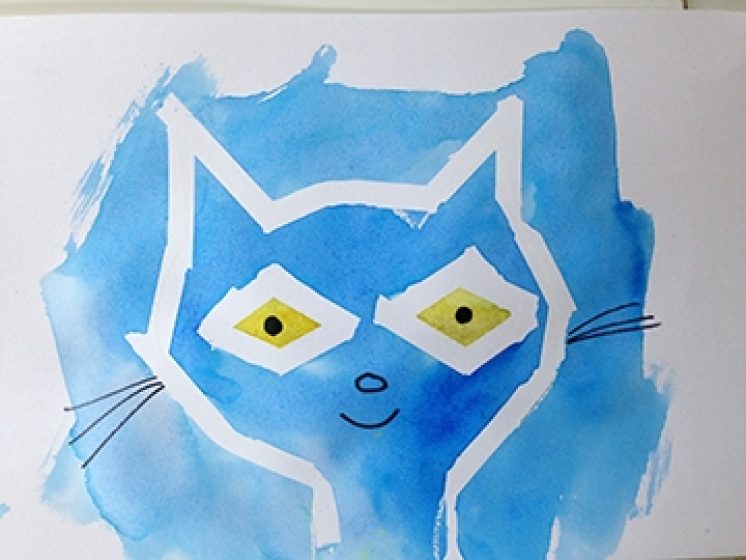
Pete the Cat Party- Painting Guessing Game
By Colie Haahr, CMNH Educator
Thank you for checking out our Pete the Cat Party video! If you followed along with the storytime, you know that Pete the Cat LOVES his white shoes, and his red shoes, and his blue shoes! He is even okay with his wet shoes! This blog post will walk you through setting up an art project guessing game, where kids can guess what Pete stepped in to change the color of his shoes.
Materials:
- Paper- cardstock, construction paper, sketch paper
- Watercolor paints
- Paint brush
- Water cup
- White crayon
- Drawings prepped ahead
Directions:
Prep Ahead: For this project, you will need to draw some pictures with a white crayon ahead of time. Each drawing should be an item that is mostly one color, and that we can imagine might change the color of Pete’s shoes. Here are some ideas:
- Green: Spinach, Peas, Avocado
- Blue: Blueberries
- Purple: blackberries, grapes
- Red: Strawberries, Raspberries, Cherries
- Orange: Oranges, Carrots
- Yellow: Buttercups or Dandelions
- Brown: Coffee, Chocolate Cake
- Black: Olives
- Draw a picture of each item on a piece of paper using a white crayon
- Set up the water colors, paintbrush, and water cup for painting
- Play the game! Ask, “what do you think Pete the Cat could step in to change his shoes a different color?” Take a few guesses.
- Now, choose one color and paint one of the pieces of paper, and see what happens! The picture you made with the crayon should magically appear
- The white crayon creates a wax resist, so the watercolors will not soak into the paper, and you can see the drawing in white.
- You can give away what color to paint each item, for example, “try painting this one red, and guess what is in the picture,” or let kids choose a color, and then ask “Is that what color strawberries are, or are they a different color?”
- Play the game for each picture you made ahead of time.
Optional: kids can try coloring with white crayons to create a wax resist, then painting over it.
Optional: you can also do this activity using tape to create an outline of Pete the Cat, and paint over it, then take the tape off when the painting is dry to see the design.
Wacky Art: Raised Salt Paintings
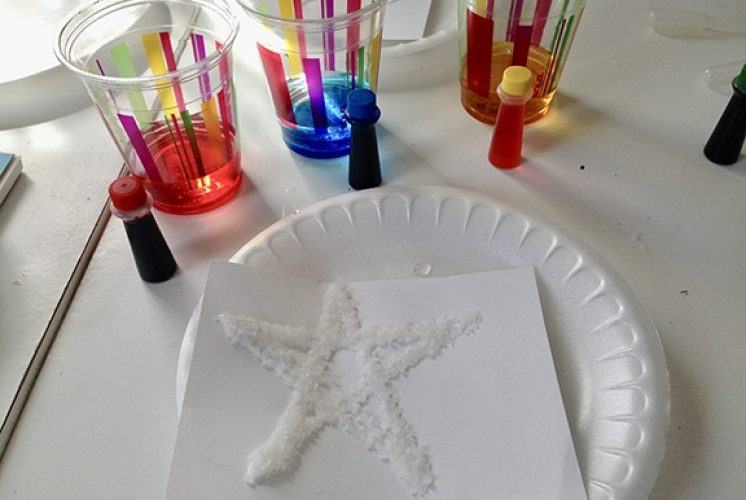
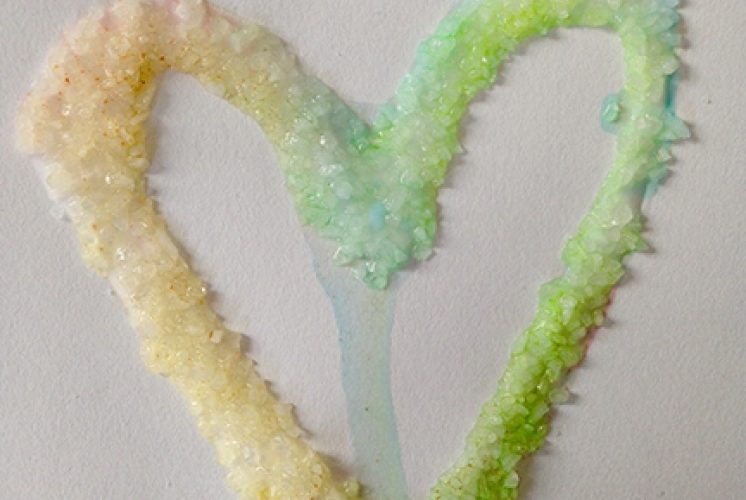
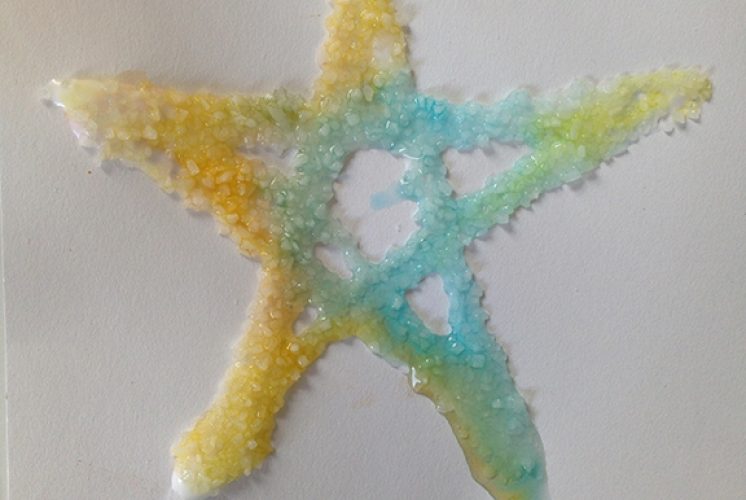
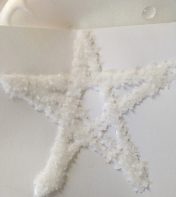
By Colie Haahr, CMNH Educator
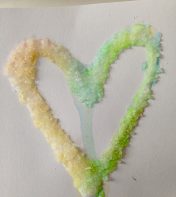
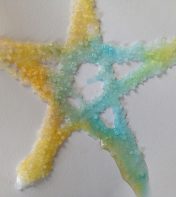
This fun art project can double as a science project! Kids make designs with liquid glue, add salt, then carefully add some colors and watch what happens! The liquid water colors should be absorbed by the salt, and move along the glue and salt design right before your eyes!
Materials Needed:
- Card stock or thick paper, construction paper works
- Tray or plate work surface
- Salt in a dish with a spoon to scoop it
- Liquid glue - that kids can use on their own
- Liquid watercolors or food coloring mixed with water
- Pipette, eye dropper, or spoon
Directions:
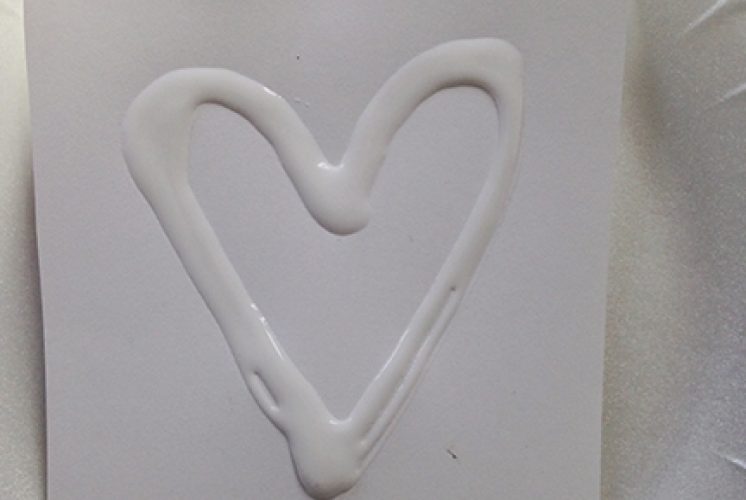
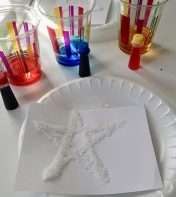
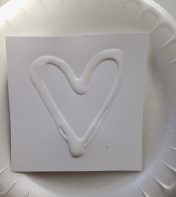
- First, make a design on the cardstock using only glue- lines work well!
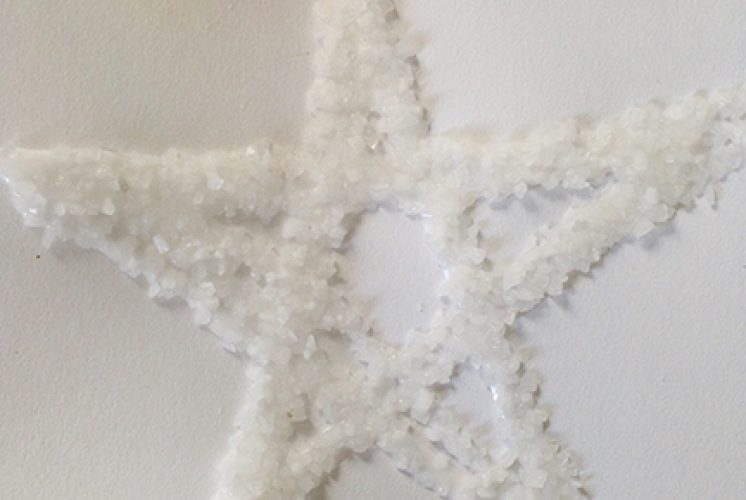
- Next, add salt to the glue so that the glue design is covered in salt. Gently pour the extra salt back onto your tray or into the trash. Similar to what you would do with glitter and glue- you want the salt covering all of the glue
- Use the pipette to carefully add colors to your design. Only add a little bit of color at a time so you can see the colors move. Only add color to the glue.
- The color should magically spread on your design as the salt absorbs the liquid
- Let your project lie flat to dry, otherwise the colors will spread where there is no glue!
Experiment:
- Here are a few ideas you can try to make this art project into an experiment:
- Try using different kinds of salt, and see which kind works best (larger or smaller grains). Make a prediction before you try each one!
- Try this project with sugar and with salt (use the same design for each), and see which works better, or if sugar works at all.
- Try color mixing by using primary colors to do the project. Can you get them to mix? Why or why not?
Links:
www.cbc.ca/parents/play/view/art-science-salt-glue-watercolour-experiment
Wacky Art: Tin Foil Printmaking
By Meredith Brustlin, CMNH Educator
This printmaking is so fun and easy to do with materials you probably already have at home! The best part is it can be done over and over again with very little clean-up in between! Here’s how to get started:
Materials Needed:
- Piece of paperboard (like a cereal box) or cardboard, slightly bigger than an average piece of paper (10in X 12in-ish)
- Piece of aluminum foil that is large enough to cover the paper/cardboard. If needed, you can use two seperate pieces to cover the board
- Tape
- Acrylic or tempera paint
- Cardstock, printer, or construction paper
- A paintbrush
- Q-tips
- Paper towels or old kitchen rags
Directions (prep):
- Make your printing board
- Cut your piece of paper/cardboard to the appropriate size
- Cover with aluminum foil
- Fold the foil over the piece of cardboard and tape on the back so it does not move around
- Prep/gather paint, brushes, q-tips, paper towels, etc
Directions (activity):
- Drizzle a small amount of paint onto your printing board
- NOTE: Start with quite a small amount, you do not want too much paint on there for this activity--you can always add a bit more!
- Use the paintbrush to spread it out across the printboard so it is completely covered
- Use q-tips to quickly draw designs and pictures directly into the paint
- NOTE: Do this fast! Since you are using such a small amount of paint, it will dry quickly
- Place a piece of paper onto the painted printboard and gently press down
- Peel away to reveal your print!
- Use a damp paper towel to clean your printboard, dry it off, and try again!
Paper Bag Mini Books
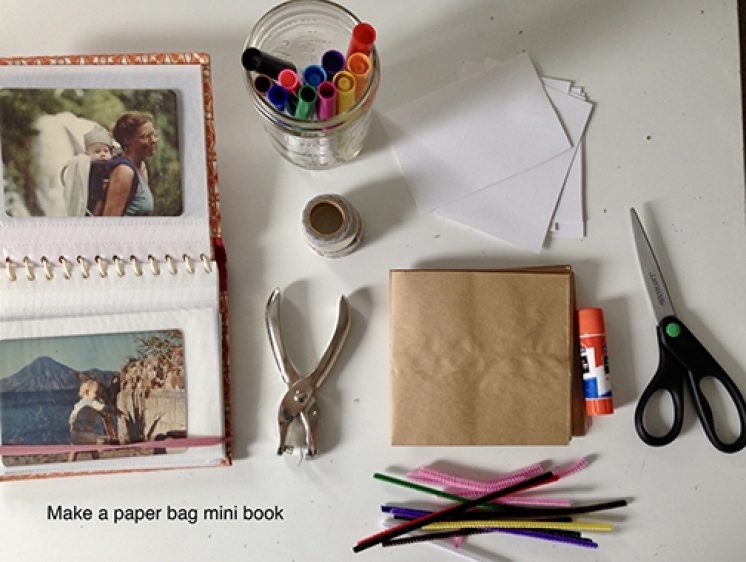
by Colie Haahr, CMNH Educator
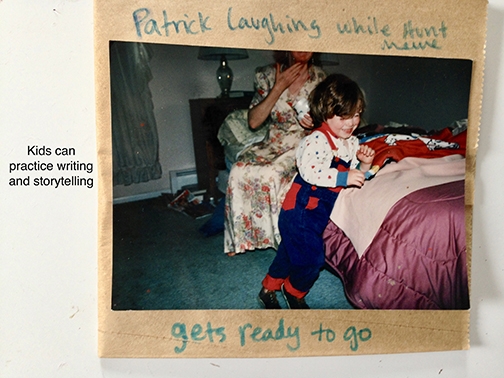
Make a mini paper bag scrapbook, nature journal, or keepsake! These books are fun for kids to put together, and the open end of the paper bag creates a pocket to store pictures, ticket stubs, or small items from a nature walk. Pipe cleaners make the book easy for kids to bind, and it’s easy to add more pages. String or binder rings can also be used to bind the book.
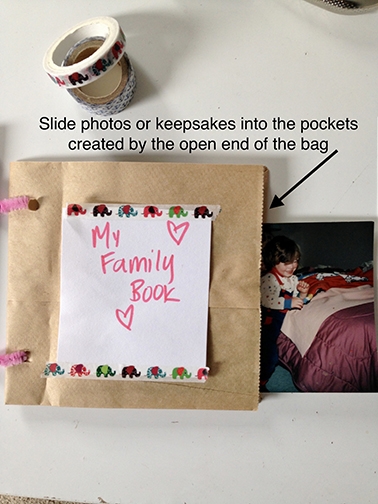
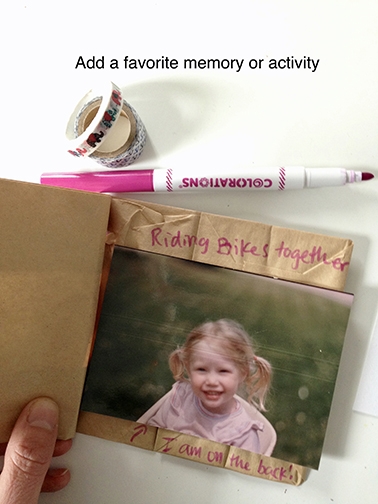
Use washi tape or glue to add photos, or print photos on copy paper so that kids can use a glue stick to add them. This also makes it easier to replace a photo if anything happens to it during the art making project. Kids can label photos, write favorite memories, or tell the story of each photo and have a grown up help with the writing part if needed.
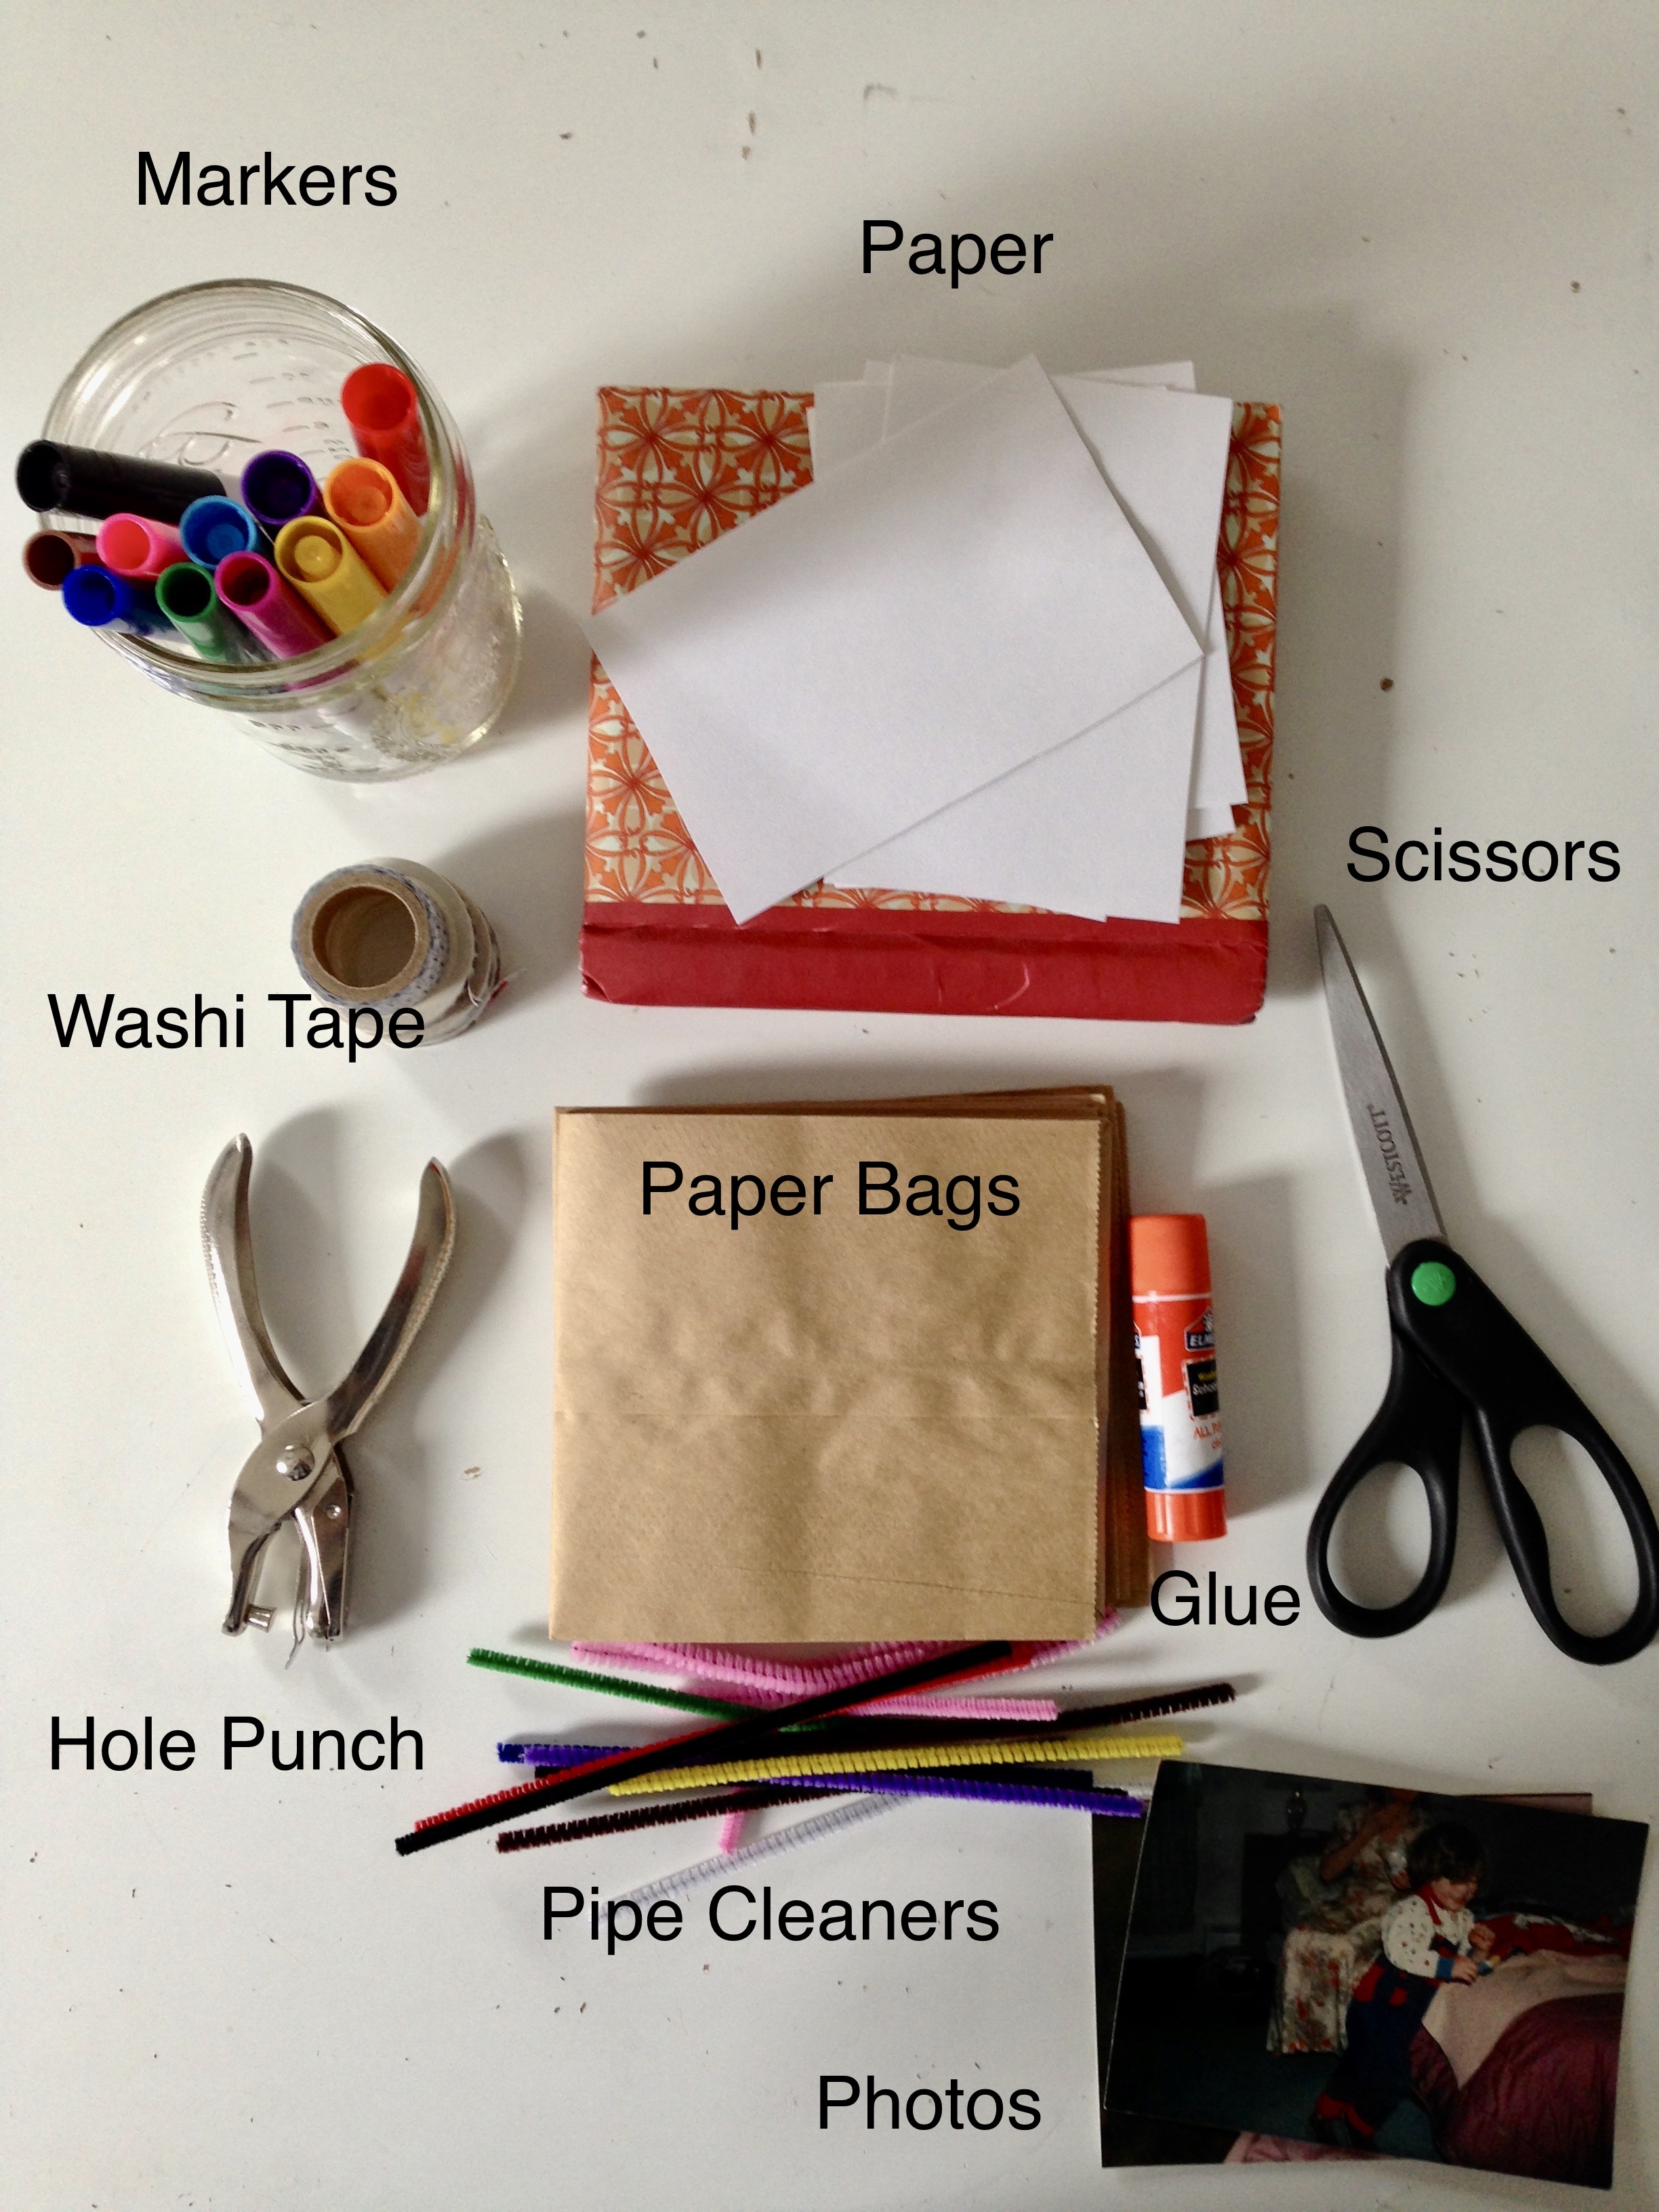
Materials Needed:
- Markers
- Washi tape
- Glue stick
- Photos - printed on copy paper
- Scissors
- Paper
- Pipe cleaners
- Hole punch
- Paper bags
Directions:
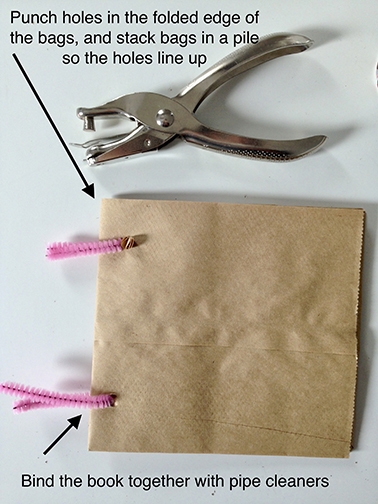
- Fold the paper bags in half, and punch two holes in the folded end of the bags. It’s difficult to hole punch through more than one bag at a time, so be sure to line the holes up on each bag
- Stack several bags together so that the folded ends are together, and the holes line up
- Use the pipe cleaners to bind the book together by feeding it through the holes
- Twist up the pipe cleaners, and cut off any excess
- Start decorating and writing in your book! Use the glue stick to add photos or drawings on paper
- Use the open ends of the bags to create pockets for keepsakes or photos
- Theme ideas: nature journal, teacher gift, family book, share favorite family activities and memories, make up a story

Up-Cycled Planters
By Colie Haahr, CMNH Educator
This is an easy, low-mess art project that kids can work on independently. Use old containers and washi tape to make an “up-cycled” planter. What is up-cycling? It’s using materials that would otherwise be discarded to make something new. We do many up-cycling activities at the museum to help reduce waste, and to allow kids to be creative with their projects by challenging them to think of new uses for things.
This project provides a good opportunity to talk to kids about reducing waste, and some ways to do that at home. Up-cylcing is just one thing kids can do to help keep the earth healthy, and it’s a great way to cut down on art supplies and packaging if you are using things you already have. The book Not For Me, Please! I Choose to Act Green, by Maria Godsey, is a nice story to read with kids that shows them some concrete choices they can make to help reduce waste. We recently added this book to our collection at the museum.
This is also a great project if you would like to give someone a hand made gift without getting out paints or any messy supplies! You can use the planter to grow something from seeds, or you can use it to put a small houseplant inside.
Materials Needed:
- Empty play dough containers with lids
- Or: A different type of container that is safe to use
- Washi tape
- Optional: scissors
- A house plant, or soil and seeds for planting
Directions:
- The first step is to make sure the container you are using is safe to use and clean. Play dough containers work well. Be sure there are no sharp edges, and carefully supervise if you choose to use glass. Mason jars and other thick glass containers do not break easily
- If you are using a plastic container, you may opt to poke a hole in the bottom with scissors for drainage for your plant. This step should be done by an adult
- Use washi tape to decorate the outside of the container by carefully adding it one strip at a time
- If you want to plant something, add soil and plant the seeds according to the instructions on the seed package.
- If you want to add a houseplant that is already growing, carefully place it inside
- If you are using a play dough container, use the lid to catch extra water under the planter
- Ask: what three things do plants need to grow?? They need soil, sunlight, and water! Place your plant in a spot where it can get some sun, and be sure to water it!
There are more up-cycle project ideas on the museum’s Pinterest account:
Links:
Check out some of our Educator's Favorite Up-Cycle Projects over on Pinterest:
https://www.pinterest.com/kidmuseumnh/cmnh-educators-picks/upcycle-projects/
Blog post that inspired the planters:
Tie-Dye Butterflies
by Meredith Brustlin, CMNH Educator
I love this art activity. It’s easy to do with items you probably already have at home. It’s such an interesting and fun process-art activity that your young artists will probably want to try it again and again and again!
Materials:
- White basket coffee filters
- Washable markers
- A binder clip
- A pencil/straw/craft stick
- Clothespin
- Small pieces of colorful paper or pipe cleaners
Directions:
- Give each young artist a coffee filter and invite them to create a circular design on it using washable markers
- Once finished, fold the coffee into a triangle
- Attach a binder clip to the top/wide end of the triangle
- Slide a pencil through the top of the binder clip
- Put a tiny bit of water into a glass or jar
- Place the triangle in the jar
- The pencil will help to hold the triangle in place across the top of the cup or jar so that it does not fall in
- There should be JUST enough water that the tip of the triangle is barely touching
- Watch closely as the water climbs up the coffee filter triangle!
- What happens to the designs?!
- When the water has climbed all the way up, carefully remove the pencil and binder clip and unfold your triangle
- Place it on a drying rack and let it to dry fully
- This should take about 20 minutes
Assemble your butterflies!
- Scrunch the coffee filter up to make wings
- Clip a clothespin in the middle to make the bod
- Add small pieces of colorful paper to the top to make some antennae
- Draw a happy face on your butterfly!
Make Recycled Paper Beads
by Meredith Brustlin, CMNH Educator
This is such an easy and fun project and is a perfect one to do during Earth Day week!
Materials Needed:
- Magazines or other scrap paper
- Pencils
- A glue stick
- String
- Mod Podge or DIY Mod Podge (white glue mixed with water)
- This is optional!
Directions:
- Prep this activity by cutting magazines or other scrap paper into long skinny triangles
- Cut the paper vertically to make the longest triangles possible!
- Starting with the wide end of one of your triangles, start rolling it tightly around a pencil
- Sometimes little ones need help with this beginning step!
- Keep rolling until you are about 2” from the end of the triangle--it should just be a skinny little strip left
- Cover that strip with glue and continue rolling to complete your bead
- Wiggle the bead off your pencil
- Make more beads!
- String your beads to make a necklace or bracelet.
If you’d like, when you’re finished with your beads--you can paint them with Mod Podge and let them dry. This will make your beads more secure and sturdy and also make them shiny!