The Museum Blog
Category: Learning
First Friends: BIG and small
By Meredith Brustlin, CMNH Educator
Hello Song:
Hello it’s time to play
Let’s have some fun today!
Let’s clap our hands
And wiggle our toes
A hug...and a kiss...and away we go!
Hello (insert name here) it’s time to play
Hello (insert name here) it’s time to play
Hello (insert name here) it’s time to play
We’ll have so much fun...hooray!
Open Them/Shut Them (action song)
Open them, shut them
Open them, shut them
Give a little clap-clap-clap
Open them, shut them
Open them, shut them
Lay them in your lap-lap-lap
Creep them, creep them, creep them, creep them
Right up to your chin-chin-chin
Open up your little mouth…
But do not let them in!
Five Little Kittens (action rhyme)
Five little kittens standing in a row,
They nod their heads to the children so!
They run to the left,
They run to the right
They stand and stretch in the bright sunlight!
Along comes a dog who’s looking or some fun…
ME-OW! See those little kittens run!
Sugar Babies (action rhyme)
Roll, roll sugar babies
Roll, roll sugar babies
Push! Pull! Clap-clap-clap!
“ “
BIG! Little! Clap-clap-clap!
“ “
Up! Down! Clap-clap-clap!
The Royal Duke of York (bounce/movement rhyme)
The royal duke of york,
He had 10,000 men,
He marched them up the mountainside
And marched them down again!
Oh, when you’re up you’re up
And when you’re down you’re down
And when you’re only halfway up…
You’re neither up nor down!
Hurry, Scurry, Little Mouse (action rhyme/tickle)
Hurry, scurry, little mouse
Starts down at your toes…
Hurry, scurry, little mouse
Past your knees he goes...
Hurry, scurry, little mouse
Past where your tummy is…
Hurry, scurry, little mouse…
Gives you a mousey kiss!
Shake your shaker! (prop song)
If you’re happy and you know it, shake your shaker...one time! ONE!
If you’re happy and you know it, shake your shaker...two times! ONE! TWO!
If you’re happy and you know it, and you really want to show it
If you’re happy and you know it, shake your shaker...three times! ONE! TWO! THREE!
If you’re happy and you know it, shake your shaker...four times! ONE! TWO! THREE! FOUR!
If you’re happy and you know it, shake your shaker...five times! ONE! TWO! THREE! FOUR! FIVE!
If you’re happy and you know it, and you really want to show it
If you’re happy and you know it, shake your shaker!!!
Goodbye Rhyme (action rhyme)
This is big, big, big
And this is small, small, small
This is short, short, short
And this is tall, tall, tall!
This is fast, fast, fast
And this is slow, slow, slow
This is yes, yes, yes
And this is no, no, no
This is hi, hi, hi
And this is bye, bye, bye!
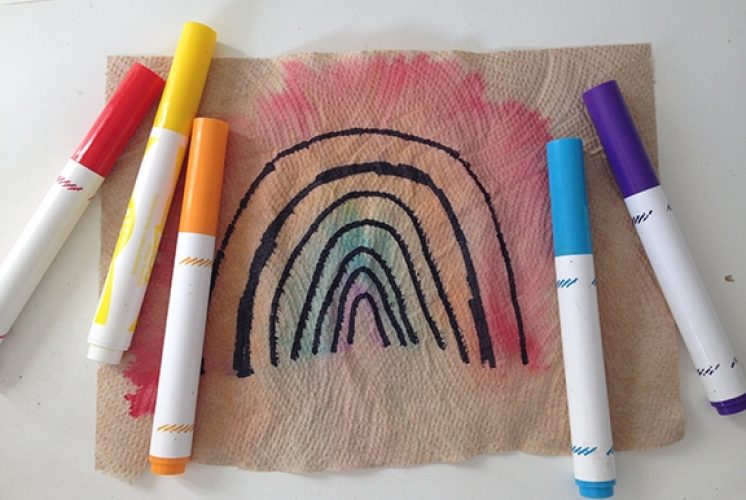
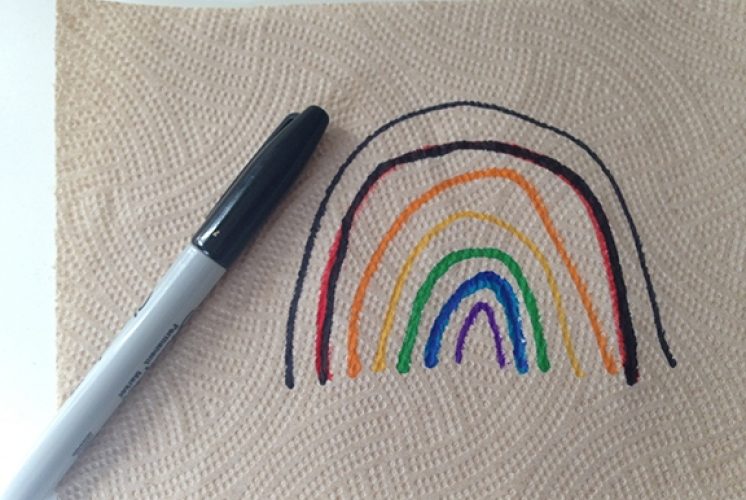
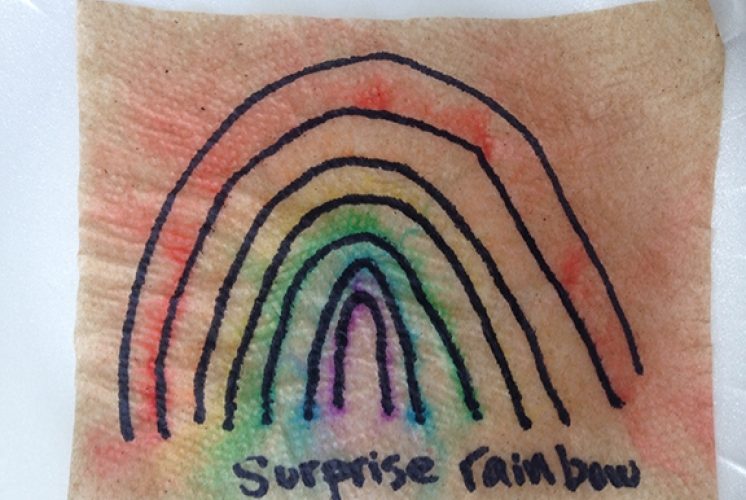
Science Magic: Secret Rainbow
By Colie Haahr, CMNH Educator
This project is fun and easy, and only requires a little bit of prep ahead of time. Kids will enjoy magically making a rainbow appear by adding water to a paper towel. This activity is fun on its own, or it can be set up as an experiment that they can try a few times and record the results.
Materials Needed:
Paper towels
Washable markers
Black permanent marker
Cup for water
Tray or plates
Pipette, eye dropper, or small spray bottle
Optional: Different brands of markers, highlighter, permanent markers, pencil, pen
Directions:
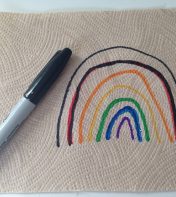
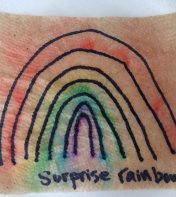
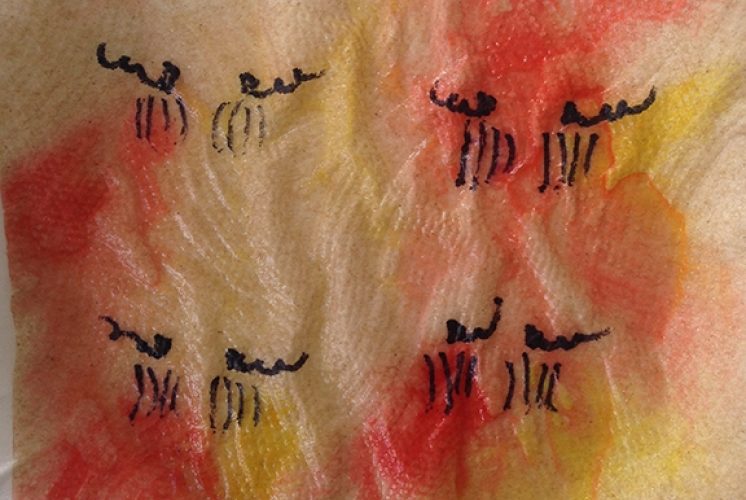
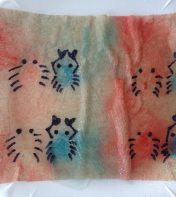
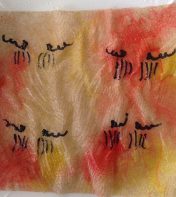
- Prep ahead: This project requires some prep ahead if you want to create a truly “secret” rainbow! You can create more sheets for kids to try as you go if they enjoy the activity! -Use a water based marker to create a rainbow on a paper towel. Remember ROYGBIV!
-Thin lines work well for this- do not make them too thick because you need to cover them with permanent marker
-Use a black permanent marker to carefully draw over each line, hiding the colorful lines under the dark lines.
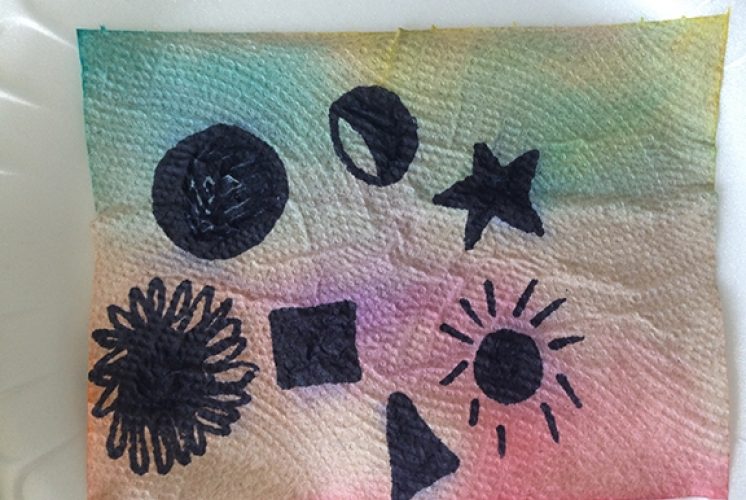
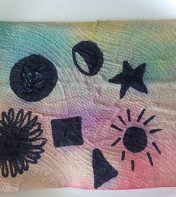
-Optional: create shapes that are different colors, and use the same process to cover them with permanent markers.
-Optional: Set up the color mixing part of the activity the same way coloring two circles next to one another in primary colors (red and yellow, red and blue, and yellow and blue)
- Place one of the prepared paper towels onto a plate or tray that is okay to use for an art project (it may get marker ink on it!), with a cup of water and pipette or spray bottle
- Make a prediction- ask: what do you think will happen when we add water?
- Ask kids to slowly add some water to the picture
- The rainbow will “magically” appear when the water based marker dye spreads, and the permanent ink stays in place
- Try the same method with color mixing, or the colors hidden behind shapes
- Let the artwork dry completely, and some of the dye will stay on the paper towel once it dries. Too much water can cause the color to wash out completely
- Alternatives: This also works with a tray of water, and kids can carefully place the paper towel in the water and watch what happens.
-Make an experiment! To make this a true experiment, try using different types of writing utensils, like markers, pens, pencils, highlighters, etc., and testing each one to see if water changes anything. Compare different brands of markers to see which ones work the best. Make predictions and write down the results!
Science Information:
For this activity there were two types of markers used, and they were made of different types of dyes or inks. One was water soluble, and one was not. If the experiment went as planned, the water based markers should have spread color out on the paper towel. These markers have dye that is water soluble, which means that it is able to dissolve in water.
The permanent marker has a different kind of ink or dye, and it is not water soluble, which means that water will not wash it away. The permanent marker is alcohol based, so it will dissolve in alcohol. If rubbing alcohol were added to the paper towel, it may have changed the permanent marker, but because only water was added, the permanent marker stayed the same.
The paper towel also played an important part in making this activity work. This activity did not work well on other types of paper, like card stock and copy paper. Paper towels are absorbent, and designed to absorb or suck up liquids. If the paper were waxed paper or something similar, the water would bead up into droplets because water molecules like to stick together. Water molecules still like to stick together on paper towels, but there are tiny air pockets in paper towels, and a soft cellulose material that allows the water molecules to move around the paper towel together.
References:
https://indianapublicmedia.org/amomentofscience/how-do-paper-towels-absorb-water.php
https://www.thebestideasforkids.com/surprise-rainbow-activities/
Oil & Water Mixing Sensory Bottles
by Meredith Brustlin, CMNH Educator
There are so many fun experiments that you can try using oil and water. If you’re at the grocery store and thinking about picking up one or two items for your young scientist’s “at home chemistry station” I definitely recommend a big jug of vegetable oil. It’s inexpensive, easy to find, and can be used for tons of science!
This experiment does some simple MESS FREE oil and water mixing. I especially like this experiment because the experiment itself is quick and can be done over and over again. Some people also use these oil & water mixing bottles as sensory bottles - moving the oil back and forth and watching the gentle waves it makes can be very relaxing. Who doesn’t need a bit of extra relaxation these days?
Here’s how to make your own:
Materials needed:
- Small jar or container with a lid that can be securely screwed on (plastic or glass--although with very young scientists you may want to go the plastic route and duct tape that lid on there, too!)
- Vegetable oil
- Food coloring
Directions:
- Fill your container halfway with water
- Pour vegetable oil in to fill up the rest of the container
- Watch and see what happens!
- Add a drop of red or blue food coloring
- Watch closely again!
- Tightly secure the lid of your container
- Optional: add some duct tape to really seal it in place
- Watch as the oil and water in your bottles become completely separate and the drop of food coloring makes its way down to the water portion of the bottle - it will take a few seconds.
- Gently move the bottle around and watch the oil and water - they stay separate when moved gently
- SHAKE your bottle! Really shake it and watch as the water and oil temporarily mix
- What else happens?!
- Watch closely again as the oil and water slowly separate
The Science:
There are several different science “happenings” going on during this experiment.
Oil & Water:
- Your scientist’s will notice that the oil and water do not mix! The oil sits on top of the water and it always will. This is because water and oil are immiscible. Basically what this means is that water molecules only want to hang out with other water molecules and the same with oil molecules. The oil sits on top because it is less dense or less heavy than the water so it happily floats on top of it.
Primary/Secondary Colors:
- Vegetable oil is used for this experiment because it is yellow in color. If we used another kind of oil, like baby oil, you would have to purchase oil based food coloring which isn’t all that easy to find. The yellow vegetable oil automatically gives us one of our primary colors. Blue or red food coloring is added so that when you mix, you get a secondary color!
- There are lots of great books you can read/find videos of online to explore primary/secondary colors, check out:
- Mouse Paint by Ellen Stoll Walsh
- Mix It Up by Herve Tullet
- Monsters Love Colors by Mike Austin
- There are lots of great books you can read/find videos of online to explore primary/secondary colors, check out:
Science Magic: Glitter & Soap
by Colie Haahr, CMNH Educator
Try out this easy experiment with materials you already have at home! This experiment is about surface tension, and you can make glitter magically “dance” in a bowl of water! The reaction is quick, but kids love trying it more than once. This could be a good experiment to try before transitioning to water play, which always seems to be a hit!
Materials Needed:
Shallow bowls or plates
Water
Glitter, Pepper, Cinnamon, or All Spice
Toothpicks or Q-tips
Dish Soap
Toothpaste
Cooking Oil
Directions:
- Set up: Pour water into bowls, and place a very small amount of all of the other liquids into lids or small bowls. A pitcher of water is helpful to reset the experiment. The experiment works best with dish soap, but using a few other substances makes it more of a true experiment, where some will work and some will not.
- Optional: have a pencil and paper handy to record observations and hypotheses
- Pour about a teaspoon of glitter into one bowl of water, and a teaspoon of whatever spices you would like to use into another. You want the glitter and spices to cover the surface of the water
- Make an observation: what happened when we poured the glitter/spices into the bowl?
- The glitter or spices stay on the surface of the water because they are hydrophobic, and they do not dissolve in water like salt or sugar would.
- Carefully dip the end of a clean toothpick or Q-tip into the liquid dish soap, and poke it right into the center of the bowl
- Make an observation: What happened to the glitter/spices? The glitter should move quickly to the edges of the bowl when the soap touches it.
- Repeat the process with the toothpaste, cooking oil, hand soap or anything else you decide to try
- Optional: write down what happens each time you try the experiment
Science Information:
Water molecules like to stick together, so when you pour a drop of water onto something non-porous, like waxed paper, the water beads up. Kids usually can picture this happening on a windshield when it’s rainy the rain drops stick together and roll down the windshield.
When you pour water into a bowl or plate, this creates surface tension.
During the experiment, you observed that the glitter and spices in the water bowls stayed right on top. Even though water molecules like to stick together, they do not always stick to other things, like the glitter and spices. The surface tension of the water allows these small particles to float on top! They do not dissolve, and usually, they do not get saturated and sink.
When you added different substances to the water, some caused the glitter and spices to move away to the sides of the bowl. Now experiments can be tricky, and they do not always work perfectly, but the oil should have made no changes to the water bowl, and the soap and toothpaste should have caused the particles to move. The substances that made the glitter and spices had something in common: they all clean things!
Dish soap should have worked the best, and this is partially because dish soap has molecules (teeny tiny parts) that are BOTH hydrophobic and hydrophilic. Wait, that would mean the soap molecules repel water molecules, and attract or bond to them! This is true, soap is a good cleaner because it can pull things like oil out of water because of the hydrophilic properties, like when we wash dishes, dish soap helps to get rid of grease and oil that water alone can’t remove.
When the soap touched the water bowl, it broke the surface tension of the water, and that’s why we could see the glitter and spices move. Soaps and cleaners are designed to break down the surface tension of water. This helps make them good cleaning tools. When you added the dish soap or toothpaste to the water it broke up the surface tension. The water molecules, however, want to stick together and maintain that tension, so they move away from the soap, carrying the glitter and spices with them! We can see the reaction because there are particles floating on the top of the water. The water would still move when soap is added, but because it is clear, we can’t see it. The glitter and spices help us see what’s happening in the water bowl!
First Friends at Home: Animals!
by Meredith Brustlin, CMNH Educator
Hello Song:
Hello it’s time to play
Let’s have some fun today!
Let’s clap our hands
And wiggle our toes
A hug...and a kiss...and away we go!
Hello (insert name here) it’s time to play
Hello (insert name here) it’s time to play
Hello (insert name here) it’s time to play
We’ll have so much fun...hooray!
Open Them/Shut Them (action song)
Open them, shut them
Open them, shut them
Give a little clap-clap-clap
Open them, shut them
Open them, shut them
Lay them in your lap-lap-lap
Creep them, creep them, creep them, creep them
Right up to your chin-chin-chin
Open up your little mouth…
But do not let them in!
Wise Old Owl (action rhyme)
There is a wise old owl,
With a pointed nose,
He has pointed ears,
And claws for toes!
He sits in a tree,
And looks at you,
Then he flaps his wings and says:
Whoooooo! Whoooooo!
Puppy Dog (bounce)
Did you ever see a puppy dog,
A puppy dog, a puppy dog
Did you ever see a puppy dog
Go this way and that?!
Go this way...and that way...and this way..and that way!
Did you ever see a puppy dog,
Go this way and that?!
(It’s fun to use any and all animals in this song! Did you ever see a kitty cat? A bunny rabbit? A great big elephant?!)
Sleepy Bunnies (song/movement)
See the little bunnies sleeping ‘til it’s nearly noon
Shall we wake them with a merry tune?
They’re so still...are they ill?!
No! Wake up bunnies!
Hop little bunnies hop, hop, hop
Hop little bunnies hop, hop, hop
Hop little bunnies hop, hop, hop
Hop, hop, hop aaaaaaaand...stop!
“ “
Jump little bunnies!
“ “
Dance little bunnies!
Scarf Opposites (prop song)
Wave your scarf up high,
Wave your scarf up high,
Wave it up high! Wave it up high!
Wave your scarf down looowwwwww
Wave your scarf down looowwwwww
Wave your scarf! Wave your scarf!
Wave your scarf fast/slow
Wave your scarf in front/behind
Wave your scarf a little/a lot!
Colors in the Air (prop song)
Colors, colors
Colors, colors
Floating in the air!
Floating in the air!
Red, Orange, Yellow
Green, Blue, Purple
Floating in the air!
Floating in the air!
Goodbye Rhyme (action rhyme)
This is big, big, big
And this is small, small, small
This is short, short, short
And this is tall, tall, tall!
This is fast, fast, fast
And this is slow, slow, slow
This is yes, yes, yes
And this is no, no, no
This is hi, hi, hi
And this is bye, bye, bye!
Tie-Dye Butterflies
by Meredith Brustlin, CMNH Educator
I love this art activity. It’s easy to do with items you probably already have at home. It’s such an interesting and fun process-art activity that your young artists will probably want to try it again and again and again!
Materials:
- White basket coffee filters
- Washable markers
- A binder clip
- A pencil/straw/craft stick
- Clothespin
- Small pieces of colorful paper or pipe cleaners
Directions:
- Give each young artist a coffee filter and invite them to create a circular design on it using washable markers
- Once finished, fold the coffee into a triangle
- Attach a binder clip to the top/wide end of the triangle
- Slide a pencil through the top of the binder clip
- Put a tiny bit of water into a glass or jar
- Place the triangle in the jar
- The pencil will help to hold the triangle in place across the top of the cup or jar so that it does not fall in
- There should be JUST enough water that the tip of the triangle is barely touching
- Watch closely as the water climbs up the coffee filter triangle!
- What happens to the designs?!
- When the water has climbed all the way up, carefully remove the pencil and binder clip and unfold your triangle
- Place it on a drying rack and let it to dry fully
- This should take about 20 minutes
Assemble your butterflies!
- Scrunch the coffee filter up to make wings
- Clip a clothespin in the middle to make the bod
- Add small pieces of colorful paper to the top to make some antennae
- Draw a happy face on your butterfly!
Science MAGIC: Invisible Ink!
By Meredith Brustlin, CMNH Educator
I was THRILLED to find this invisible ink recipe. Many invisible ink recipes involve holding dried lemon juice messages over a candle and almost setting pieces of paper on fire. Luckily, this recipe doesn’t require any heat and is totally safe---besides the slightly strong scent of rubbing alcohol. However, with it warming up outside--this would be a great outside project!
Here’s how to make your own heat-free invisible ink:
Materials needed:
- 2 medium-size glass containers (I used Pyrex liquid measuring cups)
- Q-tips
- Paintbrushes
- Paper (white paper works best, you could also use cardstock!)
- Table covering
- Cookie sheet/craft tray
- 1 tsp powdered tumeric
- ½ cup rubbing alcohol
- 1 Tbsp baking soda
- ½ water
Directions (prep):
- Set up your experiment area, whether inside or outside, by protecting the area with some kind of covering. This could be a plastic tablecloth, trashbag, or some other non-absorbent material.
- Place a cookie tray in the experiment area
- Gather all other materials and have them on hand.
Directions (activity):
- Tell little ones that today you will be experimenting with invisible ink!
- Invite them to help you mix 1 Tbsp of baking soda into ½ water in one of your glass containers
- Mix until it is mostly dissolved and keep mixing throughout your experimenting--it doesn’t dissolve all that quickly.
- Have little ones draw on their paper with the baking soda solution using q-tips
- It will be hard to see what they are drawing! They can try writing words or just doing abstract doodles. Anything will be fun to find using the invisible ink decoder!
- Put aside the drawings to dry
- While they are drying, make your “decoding” solution
- Mix 1 tsp turmeric powder into ½ cup of rubbing alcohol
- The turmeric solution will stain hands and surfaces--so be careful while mixing and using this solution. At least it won’t set your house on fire, right?!
- Once your papers are completely dry, place them on the cookie sheet and paint over them using the tumeric decoding solution. What happens?!?!
- Watch your paper change color more as they completely dry.
The Science:
(For younger scientists):
- Explain that the baking soda “ink” is changing color because it reacts or changes when it meets the turmeric solution. There is an ingredient in the turmeric that changes the baking soda to that very deep purple color when they meet!
(For older scientists):
- Turmeric is a ph indicator. This means that it will change the color of different substances when it interacts with them to show us what their ph is.
- Ph tells us the acidity or basicity of items.
- Basically, substances go through a chemical reaction when they “meet” a ph indicator and that causes them to change color.
- Think about a traditional baking soda and vinegar experiment - they combine and erupt! That is because baking soda is a base and vinegar is an acid. If we tested the ph of vinegar it would be a very different color than the ph of baking soda.
- When you paint over the baking soda papers with turmeric, we are seeing that deep purple appear because that is the color that baking soda changes when it interacts with a ph indicator.
First Friends at Home: Earth Day
This week our theme for First Friends was the great outdoors! This theme was inspired by the Museum’s week full of Earth Day programming!
Hello Song:
Hello it’s time to play
Let’s have some fun today!
Let’s clap our hands
And wiggle our toes
A hug...and a kiss...and away we go!
Hello (insert name here) it’s time to play
Hello (insert name here) it’s time to play
Hello (insert name here) it’s time to play
We’ll have so much fun...hooray!
Open Them/Shut Them (action song)
Open them, shut them
Open them, shut them
Give a little clap-clap-clap
Open them, shut them
Open them, shut them
Lay them in your lap-lap-lap
Creep them, creep them, creep them, creep them
Right up to your chin-chin-chin
Open up your little mouth…
But do not let them in!
Bumble Bee (action song, tune: Jingle Bells)
Move wiggly fingers around baby as you gently touch the different body parts the song mentions. If your little one is a toddler--help them find their body parts that the song mentions using their hands!
Bumble bee. Bumble bee
Landing on my nose
Bumble bee, bumble bee
Now it’s on my toes!
On my arms, on my legs
On my elbows
Bumble bee, bumble bee
It lands and then it goes!
I’m a little Beetle (bounce)
I’m a little beetle and I wiggle all day
If you get too close to me I’ll FLY away!
I’m a little bumble bee and I wiggle all day
If you get too close to me I’ll FLY away!
I’m a little lady bug and I wiggle all day
If you get too close to me I’ll FLY away!
I’m a little dragon fly and I wiggle all day
If you get too close to me I’ll FLY away!
Splash! Fall the raindrops (action rhyme)
Splash fall the raindrops (clap hands together softly)
To the ground they go (tap on the floor)
We need raindrops (wiggle fingers down from the “sky”)
To help the flowers grow! (stretch up high!)
Everyone can shake! (prop song)
Everyone can shake shake shake
Everyone can shake shake shake
Everyone can shake shake shake
And now it’s time to stop!
Everyone can tap tap tap
Everyone can tap tap tap
Everyone can tap tap tap
And now it’s time to stop!
Everyone can clap clap clap
Everyone can clap clap clap
Everyone can clap clap clap
And now it’s time to stop!
Everyone can wave, wave, wave
Everyone can wave, wave, wave
Everyone can wave, wave, wave
And now it’s time to stop!
Goodbye Rhyme (action rhyme)
This is big, big, big
And this is small, small, small
This is short, short, short
And this is tall, tall, tall!
This is fast, fast, fast
And this is slow, slow, slow
This is yes, yes, yes
And this is no, no, no
This is hi, hi, hi
And this is bye, bye, bye!