Junior Science: Water
Welcome to the Junior Science Explorers blog!
We will share here some of the projects, experiments and concepts that we explore in the Junior Science classes, which are designed for ages 3.5-5.
Keep learning, Keep exploring.
JUNIOR SCIENCE: Water!
Water is amazing. Everything that is alive depends on water. Water can exist in THREE different states. Some things float in water, while other sink. There's so much to learn and experiment with when it comes to water.
SINK OR FLOAT?
During class, we filled our sensory table with water and then each student chose items to place in the water. There were lots of items to choose from. We gently placed them into the water and saw if they sank or floated. We asked ourselves "What are the forces at work here?" The first was gravity—a cork falls to the ground when it is outside the water because of gravity, but stays afloat in the water because of another force–buoyancy! You can remember buoyancy by calling it “bouncy buoyancy” (say that five times fast). Buoyancy keeps things afloat or "bouncing" on the water.
EVAPORATION
The River Model in our Cochecosystem exhibit is a perfect place to talk about evaporation. You can visit any river, lake, pond or even a puddle to talk about how water evaporates thanks to the Sun and wind.
DENSITY
The concept of density goes well with the Sink or Float experiment. You can make glitter bottles to show that the water and the glitter have the same density, which is why the glitter stays afloat when the bottle is twirled.
SCIENCE STORYTIME
Fluffy and Baron by Laura Rankin is a great story to use to talk about how ducks float in the water and therefore have buoyancy.
Science Explorers for Homeschoolers: Water!

Welcome to the Science Explorers for Homeschoolers blog!
We will share here some of the projects, experiments and concepts that we explore in the Science Explorers for Homeschoolers classes, which are designed for ages 6-10.
Keep learning, Keep exploring.
Science Explorers for Homeschoolers: Water!
Water is amazing. Everything that is alive depends on water. Water can exist in THREE different states. Some things float in water, while other sink. There's so much to learn and experiment with when it comes to water.
SCIENTIFIC METHOD
Always start with the essentials! The Scientific Method is what scientists of every age use to learn things. There are four steps:
- Come up with a question.
- Observe and gather information to come up with a guess (hypothesis)
- Run an experiment to test your guess.
- Come up with an answer to your question.
For example you can use baking cookies as you go through the four steps.
- What will happen to this cookie dough when I put it in the over and bake it?
- Come up with a guess based on your observations.
- Experiment by putting the cookies in the oven.
- Come up with an answer to your question!
SINK OR FLOAT?
Try this, put an egg into a cup of water and observe what it does. Does it sank to the bottom? Does it float or have buoyancy (otherwise known as "bouncy buoyancy"? Now gradually add salt to the water. Eventually, after A LOT of salt is added, the egg will float to the top! When the egg was first put into the water it had a greater density than the water, so it sank. When salt was added to the water–it increased the density so that the egg was pushed up (buoyancy) and floated to the top of the glass.
Another great way of testing density is to make glitter tubes. We found that instead of floating or sinking, the glitter sailed along in the water, much like a feather floating in the air. This is because the glitter and the water have very similar density.
Augmented Reality Sand Table
A New Exhibit Opens at the Children’s Museum of New Hampshire
Children Shape the Landscape with an Augmented Reality Sand Table
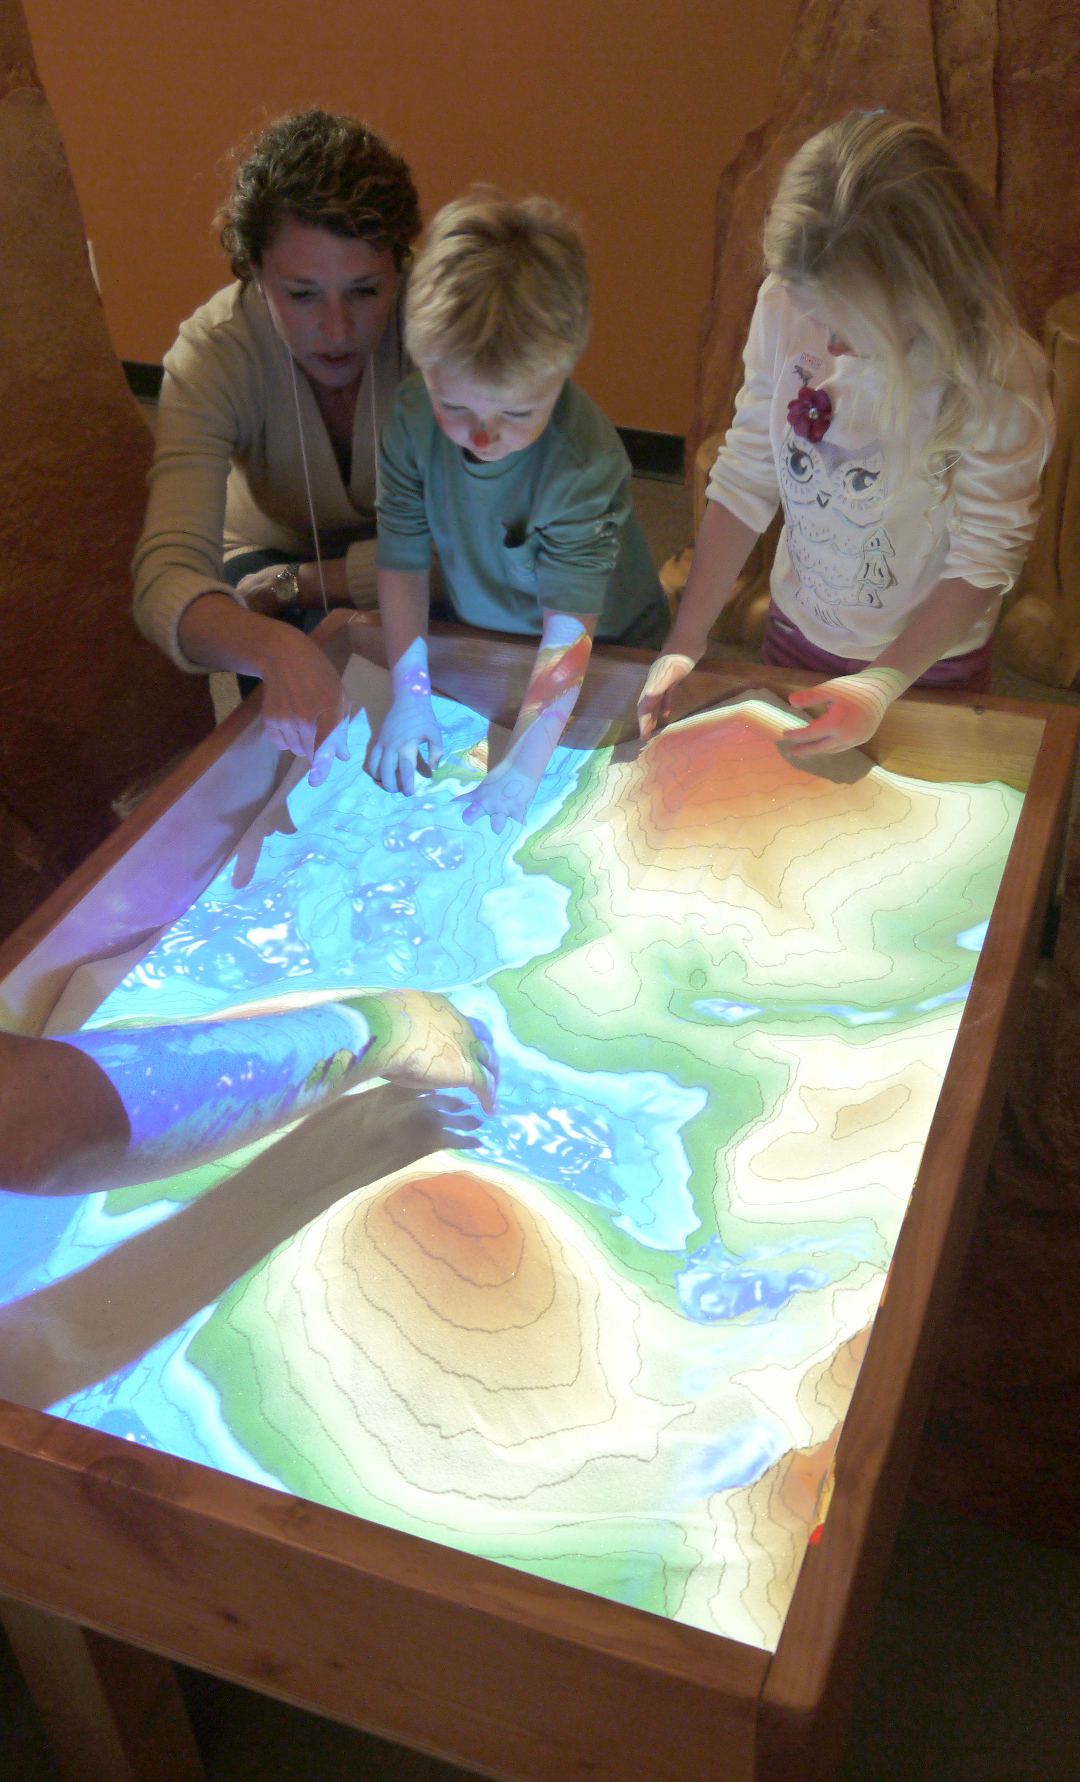 A new exhibit has opened at the Children’s Museum of New Hampshire and it combines all the fun of a sand table, with some interactive and responsive high tech imagery. Guests to the Museum can help shape the landscape with a new augmented reality sand table, installed in the ever-popular Dino Detective area.
The technology behind this new exhibit was developed by the UC Davis W.M. Keck Center for Active Visualization in the Earth Sciences (keckCAVES), as part of an informal science education project funded by the National Science Foundation. This hands-on exhibit allows guests to create topography models by shaping real sand, which is then augmented in real time by an elevation color map, topographic contour lines and simulated water, rain and even snow. The system was created to teach geographic, geologic and hydrologic concepts, but the exhibit takes on a different significance when placed in the Museum’s Dino Detective area.
“The sand table relates to the Dino exhibit well,” says Exhibits Director Mark Cuddy. “Geology looks at changes to Earth’s landscape over time, which helps paleontologists determine where to find fossils and, sometimes more importantly, where NOT to look for fossils.” In the rest of the Dino Detective exhibit, guests can dig for fossils, donning the protective eye gear and using the specialized tools that paleontologists would use to unearth these remains. “This entire exhibit is about exploration and questioning what we think we know. Why are the dinosaurs extinct? What can we learn from their bones? How does the water flow around the sand? What happens when I build a dam and then break the dam? Where does the water go?” These kinds of questions are answered, not through labels on a wall, but by the constantly shifting interactivity between the augmented reality component, the sand and the children.
“The best part about this exhibit is that it appeals to everyone. Young, old, new or repeat visitors: Everyone loves to play with the sand!” says Mark. “I’ve heard some great things while watching guests at the table. Things like ‘Woah! Look I made it rain!’ or ‘Let’s all push the sand into a big mountain in the middle of a lake.’ It keeps our guests constantly engaged and learning.”
Here Comes the Sun
By Sarah Terry
Well, I am thrilled to report that the first session of our inaugural Maker Club at Woodman Park Elementary went wonderfully! It was so much fun, the kids are a blast to work with, and by the end of the hour, we had ten working Artbots bumping their ways around the room! One of our second grade students told her teacher afterwards, “You know, I never thought I would ever make a robot... and then I did!”
We had three-legged ArtBots, four-legged ArtBots, double ArtBots, BotBots (bots without marker legs, of course!), and more! It was quite the buzzy creative party!
And there's only one way for a Maker Club to celebrate this success... by making more stuff!
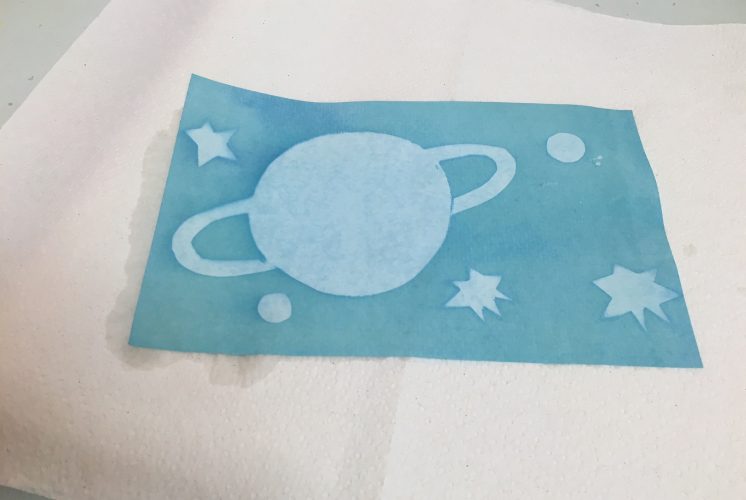
 Our next hands-on project involves one of my favorite ways to combine art and science – photography! I'm probably on the edge of the last generation that remembers using film cameras. I was just getting old enough to learn how to load the film myself when digital cameras became popular and quickly took hold of the market. Digital cameras are fascinating in their own right and have made photography more accessible than ever, but my mother is a photographer and I'll always have a soft spot for film... and the chemistry you can learn by understanding how it works!
There are many types of film that use different chemicals to capture different colors of light, but we're going to be working with cyanotypes!
Cyanotypes, sometimes called sun prints, were invented in 1842 by Sir John Herschel. Does that name sound familiar? Herschel's father William is the man who discovered Uranus! John Herschel continued his father's work in astronomy – he named seven of the moons of Saturn, and four moons of Uranus – but he also made large contributions to the field of photography.
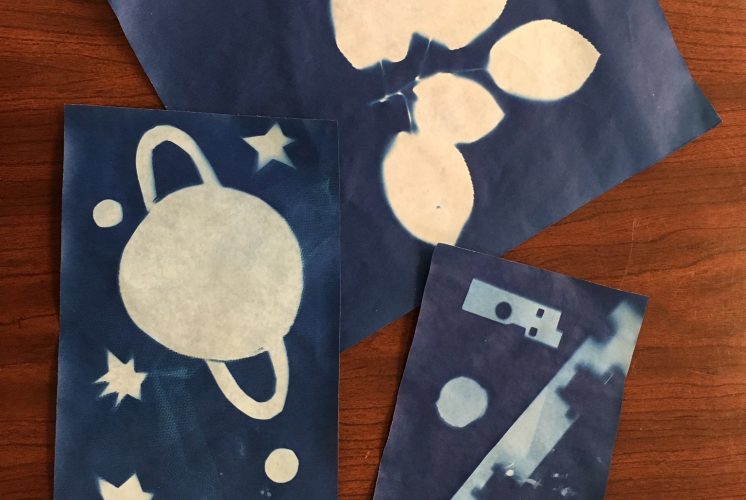
Cyanotypes were originally used to reproduce notes and diagrams (their bright color is where we get the term blueprint from!). The first person to use the process to make photographs was Anna Atkins, an English botanist and friend of John Herschel. She is considered by some to be the first female photographer! She used the process to document different kinds of algae and seaweed, and published a book called (fittingly), Photographs of British Algae: Cyanotype Impressions. Technically, what Atkins created were photograms. Photograms are made by contact printing – she put pieces of algae directly on the paper and exposed it to create her images!
We're going to be making some photograms of our own today!
Now, I bought already-treated cyanotype paper film, but you can actually make the film yourself! This process involves chemicals, so you'd want to make sure you have goggles, gloves, a mask and a well-ventilated area to work in! This article documents the process, and the supplies you'd need.
Materials:
- Sunprint paper
- Supplies to make your image. Now this could be all kinds of materials – I cut designs out of paper, and used some mesh, but you can use leaves, shells, Legos, anything you think has a cool outline!
- Plexiglass sheet
- Plastic bin
- Vinegar (or lemon juice!)
- Water
Now cyanotypes are made through a chemical reaction with UV or ultraviolet light! The chemicals in the paper – ammonium iron (iii) citrate and potassium ferricyanide – react with UV light to create an insoluble blue dye! Then you develop the film in water and a little vinegar, and your print is finished!
To begin, make sure that you are in a room where sunlight can't reach you! You don't want any UV light to touch your print before you're ready. Luckily, indoor lights aren't powerful enough to produce ultraviolet light, so you don't need to work in a darkroom, like you would for ordinary film.
Get the complete step-by-step instructions here in a handy dandy printable PDF
Check out this video to see the process in action!
Storytime: Nursery Rhymes
 By Meredith Lamothe
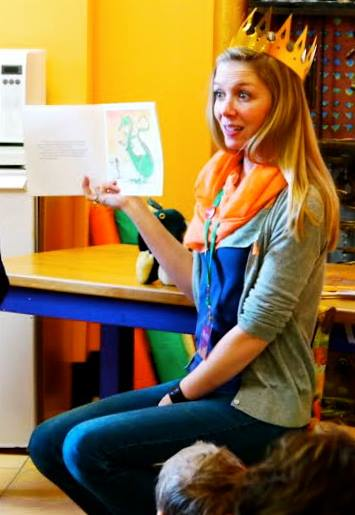
Hi there! I am the Lead Educator at The Children’s Museum of New Hampshire and also the host of Baby Storytime. I have a Bachelors Degree in Theatre from The University of Southern Maine and a Masters of Library and Information Science with a focus in Children’s Services from Simmons College.
I’m passionate about early literacy and excited to share information with you about our weekly Baby Storytime stories and activities. Join us for the next Baby Storytime which meets every Wednesday in the Museum's Primary Place exhibit at 9:45am.
NURSERY RHYMES
We started with "Open Them, Shut Them," which we do every week. I thought I’d post the words here for anyone who doesn’t know this wonderful song/finger play.
Open them, shut them
Open them, shut them
Give a little clap clap clap!
Open them, shut them
Open them, shut them
Lay them in your lap
Creep them, creep them
Creep them, creep them
Right up to your chin chin chin!
Open up your little mouth…But do not let them in!
I love that one!
The reason we do this rhyme every week and why I will commonly use the same rhymes/songs/finger plays is because repetition is so important for babies and for early literacy! Even though we, as adults, may get tired of hearing the same rhyme/song over and over again–babies enjoy hearing the same things over and over again. They gain familiarity with the actions and words and are able to play along. They’re also learning vocabulary from those songs and rhymes and each time we sing the song or say the rhyme it is a little different and babies will always be getting something different out of our repetitions!
LITERACY TIP
Our literacy tip today is about rhythm in rhymes or songs. Babies are learning to speak our language just as we would have to learn to speak a new language–to many of them our words sound like big long strings of sounds with no clear words or phrases. When we bounce babies on our laps while singing a song or saying a phrase or when we clap out words during a rhyme (this was tricky!) we’re helping to get them ready to read by knowing that a number of different words make up a sentence which makes up a story or song.
The rhyme that we clapped to was “To Market”
Here are the words:
To market, to market to buy a fat pig
Home again, home again, jiggety-jig
To market, to market to buy a fat hog,
Home again, home again, jiggety-jog
This is another fun rhyme about Rain!
Rain on the green grass,
And rain on the tree;
Rain on the house top,
But not on me!
The Wacky Scientist Reflects on his Career
By Doug Tilton
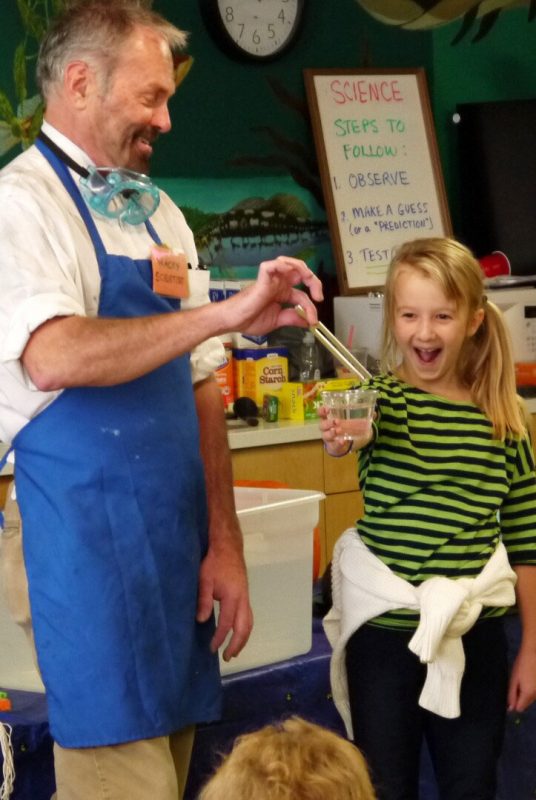
I have had the honor of being the “Wacky Scientist” for the Children’s Museum of New Hampshire for about 14 years now and I spend all year preparing for and looking forward to the October Not-So-Spooky Spectacular! I’m actually the second “Wacky Scientist” to hold this position. The first Wacky Scientist was a former employee named Bill Stroup. He and Jane, our current President, came up with the slightly misleading moniker of “Wacky Scientist.” I’ve never thought of myself as particularly “wacky” (but I suppose I have my moments). In my pre-wacky days I actually did a lot of theatre and directing, which I think has served me well when trying to keep my young audience attentive and entertained.
I had presented science concepts to children’s audiences for years and directed others to do it, but still, the first time I did it as the Wacky Scientist was still a new experience. I relied on my fellow educators to help develop the science experiments that have become a signature highlight of our Halloween celebrations. Then as time went on, I started creating my own experiments and made sure that each show was different and unique!
A few of my favorite experiments over the years have included anti-gravity in a jar, “sink or float,” giant gyroscope, Coke and Mentos explosion and screaming balloons! Of course there are always unexpected surprises. Sometimes those surprises come in the form of costumed kids who want to talk to their friends through my experiments, or perhaps think they already know all about what I’m doing. THEY are the ones I make into my first assistants! Hey, every Wacky Scientist needs a Wacky Assistant. It’s in the bi-laws.
Of course, being a Wacky Scientist, or a Wacky Assistant, isn’t all fun and games. Occasionally it requires some serious dedication and risk taking. One year I was working the kinks out of a fantastic experiment where I used a bungee cord to drop a raw egg from the ceiling onto my assistant’s face! We carefully measured everything to make sure that the bungee would stop the egg from hitting his face at the very last second. Let’s just say, the Wacky Assistant’s dedication was tested that day, as were my Wacky nerves. But in the end, we measured correctly and didn’t end up with any egg on our face, literally or idiomatically.
Are you bringing your wacky kids to this year’s Not-So-Spooky Spectacular?
Storytime: The Royal Duke of York
By Meredith Lamothe
Hi there! I am the Lead Educator at The Children’s Museum of New Hampshire and also the host of Baby Storytime. I have a Bachelors Degree in Theatre from The University of Southern Maine and a Masters of Library and Information Science with a focus in Children’s Services from Simmons College.
I’m passionate about early literacy and excited to share information with you about our weekly Baby Storytime stories and activities. Join us for the next Baby Storytime which meets every Wednesday in the Museum's Primary Place exhibit at 9:45am.
 NURSERY RHYMES
I had a request for the lyrics to “The Royal Duke of York” (otherwise known as "The Grand Old Duke of York") as well as the motions – so here they are!
BOUNCE: The Royal Duke of York (This is sung to the tune of “A Hunting We Will Go”)
Bounce babies on lap. When you say “up,” lift them up, when you say “down,” sit them back down in your lap.
Oh, the Royal Duke of York,
He had ten thousand men,
He marched them up the mountain top
and marched them down again.
Oh, when you’re up, you’re up.
And when you’re down, you’re down.
And when you’re only halfway up,
You’re neither up nor down.
He rolled them to the left.
He rolled them to the right.
He rolled them backwards down the hill
Oh what a silly sight!
LITERACY TIP
Singing and saying Nursery Rhymes is a great way to get babies ready to read! Children who know nursery rhymes by heart tend to have an easier time learning to read because playing with the rhymes (whether saying them or singing them) helps them to understand how words come together and go apart!
The Mother Goose Story book we used today is one of my favorites and is illustrated by Rosemary Wells, here’s a link to the Amazon listing: http://www.amazon.com/My-Very-First-Mother-Goose/dp/1564026205
Meet the CMNH Staff: Doug Tilton
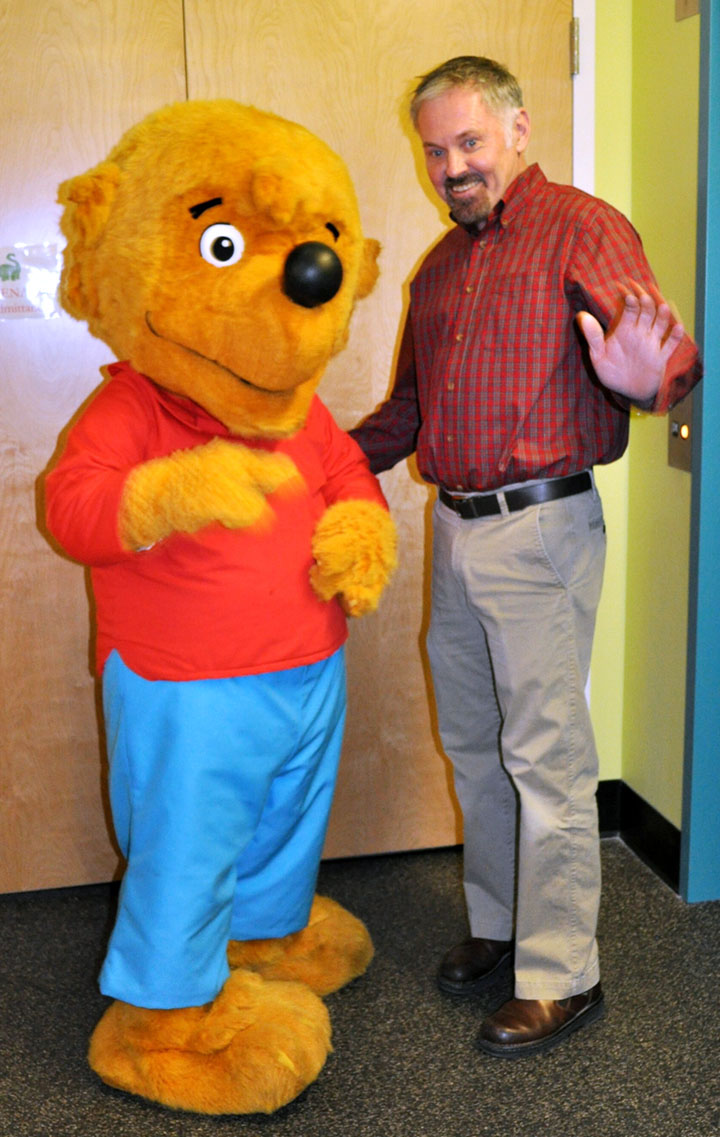 Name: Doug Tilton
Title: Visitor Services and Operations Director, Volunteer and Intern Coordinator
How Long He Has Worked at CMNH: 16 years
What is the most fun part of your job?
I like it when I get to see programs and events work well. I also like to see Museum visitors engaged and getting a lot out of the experience.
What is something people might not know about you?
I’m a puppeteer and I trained other people to be puppeteers for years. I never took a theater course, but I ran a theater for 14 years. I was the Associate Director of the Little Red Wagon Touring Program and I helped with New Hampshire outreach.
What is your favorite exhibit at CMNH and why?
The Post Office. I like it because it has mailboxes throughout the museum so it encourages kids to explore other exhibits. Also, there are so many things to do there, sorting mail, delivering mail, running the post office. It even helps kids learn to read!
