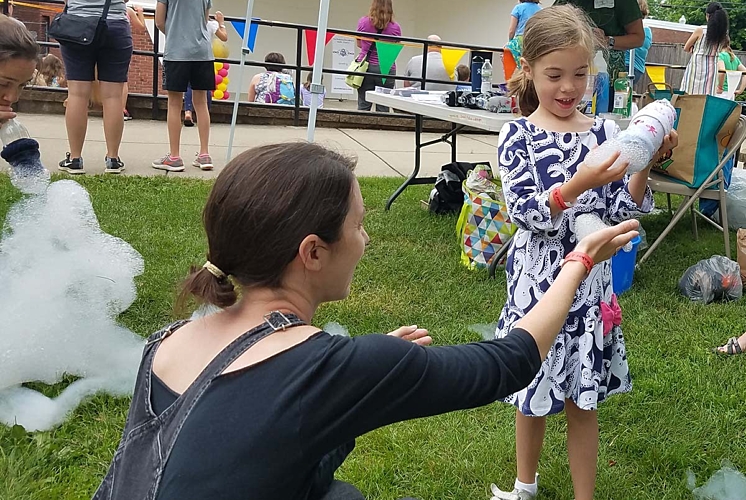
Military Families Play for Free All Summer
Armed Forces Day, Saturday, May 21 was the start of the Children’s Museum of New Hampshire’s Military Appreciation Summer, during which all current and retired military personnel and their immediate family members are invited to play at no cost, thanks to a generous sponsorship from Service Credit Union.. From now through Sunday, September 4th, 2022, guests can reserve their spots online for free, and then simply show a military ID at the front desk of the museum to receive free admission for the military member, dependent children and spouse.
“We are proud to once again partner with the Children’s Museum to sponsor their Blue Star program,” said Jaime Yates, Service Credit Union Community Relations Manager. ‘At Service Credit Union, we have a longstanding history of supporting our military members, veterans and their families, and this program is one of the ways we can give back to those who have given so much to us.”
The museum’s summer Military Appreciation Program is exclusively sponsored by Service Credit Union and is part of the larger nationwide Blue Star Museum program. The Blue Star Museum program is a collaboration between the National Endowment for the Arts, Blue Star Families, and the Department of Defense. More than 2,000 museums across America offer free admission to the nation’s active duty military personnel, including National Guard and Reserve and their families from Armed Forces Day through Labor Day. “Thanks to the generous support from Service Credit Union, the Museum is thrilled to extend free admission to include retired military personnel and their family members” said Jane Bard, Museum President.
The summer free admission program is available to active duty and retired U.S. military - Army, Navy, Air Force, Marines, Coast Guard, as well as members of the National Guard and Reserve, U.S. Public Health Service Commissioned Corps, NOAA Commissioned Corps - and up to five family members.
The Children’s Museum of New Hampshire extends a fifty-percent-off discount to military personnel and their families during the rest of the year thanks to additional sponsorship support, including from People’s United Bank.
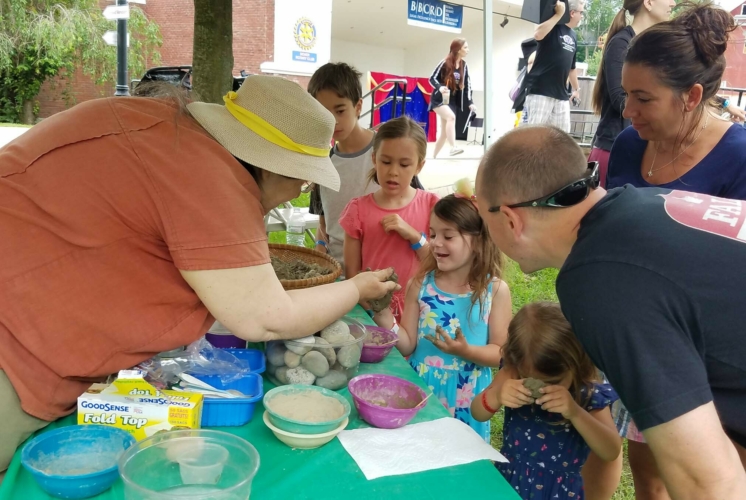
DIY Bee Condo
By Megan Beach, CMNH Educator
Did you know that you can build a homemade house for bees to live in? Although bees will make their own hives in places like hollow trees, or by burrowing in the ground they also will move into a bee condo, that you can make at home with just a few materials.
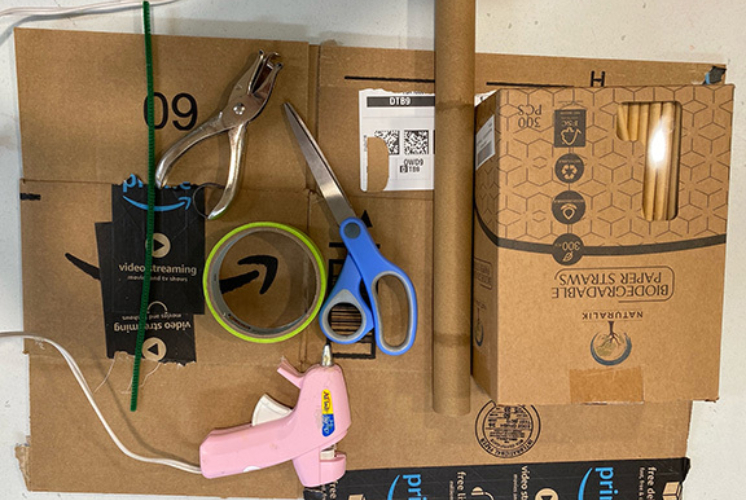
What you need to make a bee condo:
- Cardboard pieces, or heavy card stock
- Empty paper towel roll cut in half
- Paper straws (important that they are not plastic)
- Scissors
- Masking tape
- Hot glue gun (Make sure to get a grown-up to help)
- Hole punch and pipe cleaner or string
Bees find a house made out of a bundle of paper straws with one side blocked off to be a welcoming place for a home. They also prefer darker colors for their houses (it reminds them of trees) so using a brown cardboard box or dark paper works the best.
Instructions:
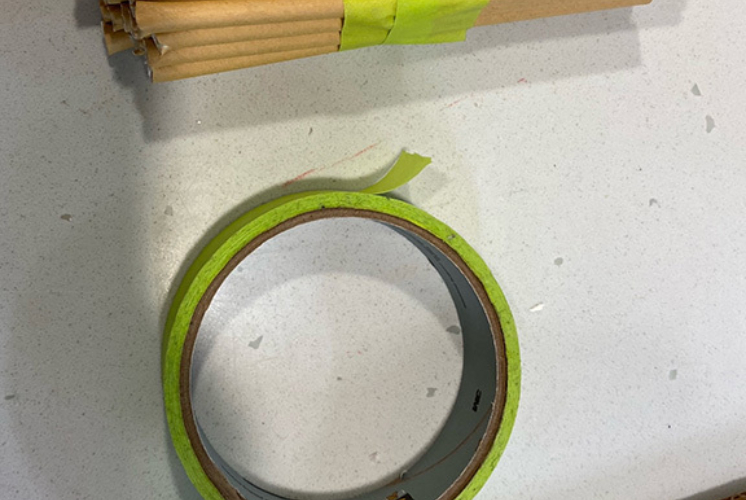
- Trim straws to the length of your cut paper towel roll and bundle them together with tape.
- Once straws are bundled and taped fill the tube with them and secure with glue if needed.
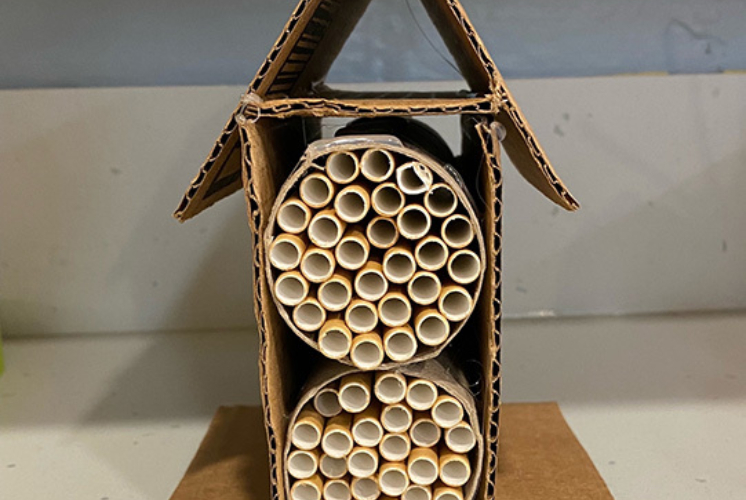
- Cut pieces of cardboard to fit securely around tubes in the shape of a house or tent to your liking and use the hot glue gun to fasten them together.
- Make sure to add a piece of cardboard to the back to cover one side of your bee condo.
- Use hole punch to string the pipe cleaner through the top of the house for easy hanging.
Optional:
Add moss, leaves or pinecones to the roof or any empty areas of your bee condo to help them feel more at home!
If bees do make a home in the condo be sure to not disturb them. Leave the bees alone so they can pollinate plants for us and make honey!
Mo Willems’ Latest Character to Visit Children’s Museum of NH

Fans of Mo Willems rejoice! One of the stars of his latest silly series of early reader stories is visiting the Children’s Museum of New Hampshire this Friday, November 12 and Saturday, November 13. Zoom Squirrel is just one of MANY zany furry characters in Willems’ Unlimited Squirrels series and Zoomy is visiting CMNH to help guests celebrate Books Alive and Family Literacy Month.
Books Alive is one of the Museum’s most popular programs that gives young guests a chance to pose for pictures and interact with a lovable costumed picture book character, hear a special storytime, and take part in literacy themed activities. Books Alive characters visit the museum throughout the year, and Zoomy’s visit falls in November, when CMNH celebrates Family Literacy Month. All month CMNH offers author-themed activities and challenges, literary scavenger hunts, and visits and performances from special guests like Zoomy, as well as storyteller Simon Brooks (Saturday, November 20th).
CMNH Members can reserve spots for a free special Member’s Only “Meet and Greet” on Saturday, November 13 from 8-9am. Online reservations required and proof of membership at door.
So if your kids love Mo Willem books, come visit CMNH to introduce them to acorn puns and squirrel fun with Zoom Squirrel. Zoom Squirrel will be in the museum for the book readings at 10am during the morning play sessions (9am-Noon) on Friday, November 12 and Saturday, November 13, and at 2pm during the afternoon play sessions (1-4pm) on the same days. Visits with Zoomy are included with museum admission, and online reservations/pre-payment is required. The Children’s Museum of New Hampshire closes between play sessions and has a capacity limit. Masks are required for everyone over the age of 24 months regardless of vaccination status. The museum thanks its sponsors including Eastern Bank and Kennebunk Savings. Visit www.childrens-museum.org to reserve or pre-pay.
CMNH Receives $10,000 Grant from Liberty Mutual
Despite the global pandemic and associated challenges, the Children’s Museum of New Hampshire (CMNH) has ensured that its educational programs remain accessible to all. One corporate supporter, Liberty Mutual, has recently gifted CMNH a $10,000 grant to support this effort.
“We’re proud of our long-term relationship with the Children’s Museum of New Hampshire and we’re proud to support the Museum and its dedicated staff as they champion equitable access to educational opportunities for children and families in our community,” said Matt Keane, Director, Liberty Mutual.
After the museum reopened in September 2020 with a reduced schedule and daily attendance limits to provide a safe space for visitors, most of whom are too young to receive a vaccination, the museum has experienced an 86% reduction in admissions revenue.
“We’re so grateful that Liberty Mutual understands the urgent need for high-quality enrichment activities and programming for young children,” said Jane Bard, CMNH President. “We continuously field requests from social service agencies for admission passes for their clients, and see a demand from visitors using EBT (food stamps benefits) cards for discounted visits with their children. This grant will make it easier for the Museum to continue serving as an integral economic, educational and cultural resource for the seacoast region
Museum discounts vary and include Military, teacher and EBT discounts, as well as social service agency passes. Information about admission discounts can be found online here.
“We want families to know that they can turn to us when looking for quality programming for their young children, and that they will be welcomed regardless of their financial status,” said Bard. “Without the support from foundations and businesses like Liberty Mutual, offering these kinds of accessibility and inclusion programs would be a much greater burden on the museum.”
To learn more about visiting the museum, and to pre-pay/reserve a date/time, guests can go online here. The Museum is currently open for two 3-hour play sessions per day, Tuesdays through Saturdays, 9 a.m.-12 p.m. or 1-4 p.m., as well as one morning play session on Sundays, 9 a.m.-12 p.m. Reservations are required and masks are required for everyone over the age of 24 months, regardless of vaccination status.
Our Furry Friends: Pet Portraits by NH Artists
Our Furry Friends: Pet Portraits by NH Artists
New Gallery 6 Art Exhibition at the Children’s Museum of NH
Whether you call them fur babies, best friends, or companions for emotional or physical support, pets are a part of many people’s lives. Two out of every three American homes includes at least one pet and 95% percent of those households consider their pet to be a family member. Join the Children’s Museum of New Hampshire as they celebrate these furry family members and their unique personalities as captured through the art of four New Hampshire pet portraitists.
“Our Furry Friends: Pet Portraits by NH Artists” is the latest Gallery 6 art exhibition at the Children’s Museum of New Hampshire, and will be on display October 9, 2021 through January 30, 2022. Feature artists include photographer Greg West of Sit.Stay.Smile, acrylic and sketch artist Rebecca Lane of one lane studios, watercolorist Nicole Murphy Fish of Fancy Animal Art Studio, and illustrator Abby Aimesbury.
The Children’s Museum wants visitors to be a part of the fun. Museum visitors and social media followers will also be invited to participate by creating and sharing their own pet portraits for display in the Museum and the Museum will host pet portrait art-making, pet crafts, and special activities throughout the exhibition’s duration.
The Museum will also be adding a Vet Play Exhibit area sponsored by Dr. Timothy Hunt of Winichahanat Veterinary Care in Dover. This mini-veterinarians office will include stuffed animals, veterinary tools, dress up clothes, and books, and will be open during the months of the gallery show. Some of the other special activities include a “pet washing” sensory station, making pipe cleaner pets in the Muse Studio, and a special Explore More activity like inventing your own pet out of clay.
In addition to professional and visitor-created artwork, this exhibition will feature information about three animal-focused NH non-profits making a difference in their communities. The Pope Memorial Humane Society provides a safe, temporary home to more than 1,000 surrendered, lost, abused, neglected, or unwanted animals each year. ElderPet is volunteer-run and facilitates the human/pet relationships of senior citizens, people with disabilities, hospice families and clients of health care and other facilities. Operation Delta Dog rescues homeless dogs and trains them to be service dogs for veterans with PTSD and related challenges.
Gallery 6 is located in the Children’s Museum of New Hampshire and is made possible by support from the New Hampshire State Council on the Arts, Fuller Foundation and the TD Charitable Foundation.
IMAGE: Top left to bottom right: photographer Greg West of Sit.Stay.Smile, watercolorist Nicole Murphy Fish of Fancy Animal Art Studio, acrylic and sketch artist Rebecca Lane of one lane studios, and illustrator Abby Aimesbury.
Rochester Resident Free Admission Days

Children’s Museum of NH Offers Free Admission Days for Rochester, NH Residents
On Tuesday, September 28th, 2021 and Saturday, October 9th, 2021 families who live in the Lilac City of Rochester, NH will want to reserve a time to visit the Children’s Museum of New Hampshire in Dover because, thanks to generous support provided by the UNIQUE College Investing Plan, they can visit for free with proof of residence.
“Rochester, NH is very close to Dover,” shared Neva Cole, CMNH Communications Director. “It’s only a short 20-minute drive away, and yet we’ve noticed that Rochester families don’t seem to make up a very high percentage of our visitors. We’re grateful to the UNIQUE College Investing Plan for this sponsorship which allows us to reach out to our neighbors and hopefully introduce them to a family friendly resource for kids and caregivers!”
Visitors from Rochester, NH or beyond are asked to reserve/pre-pay online for the museum’s daily play sessions, 9am-Noon or 1-4pm (Tuesdays – Saturdays, and only 9am-Noon on Sundays). For Rochester, NH residents looking to reserve for Tuesday, September 28 or Saturday, October 9, the museum asks they just reserve using the “w/discount (will pay at door)” price type options, and then present proof of residence at the door when they arrive. Masks are required for everyone over 24 months, regardless of vaccination status.
EasyPark USA will no longer be an option for Parking in Dover
From the City of Dover
September 4, 2021
The in-vehicle parking payment device EasyPark that works with Dover, Durham, Manchester and Portsmouth parking meter systems will be phased out as customers use up their remaining balances. Existing customers have the option of adding funds to their dashboard EasyPark device one more time.
EasyParkUSA, the firm behind EasyPark, notified participating New Hampshire municipalities that it is phasing out the devices due to decreased use and increased availability of pay-by-phone options in most communities, including Dover with the Flowbird app. EasyParkUSA discontinued sales of its devices to participating New Hampshire municipalities earlier this year.
After adding the final amount of funds, device owners must notify EasyParkUSA to close their account. No annual or monthly service fees will be charged once the account is closed. When deciding how much to add for the final reload, users should understand that the device can only hold approximately 30 parking sessions in its memory. Users will be unable to download the memory once the account is closed.
EasyParkUSA will be alerting New Hampshire subscribers to the program's end via their account emails.
For more information, contact the Dover Parking Bureau at 603-516-6132.
2021 NH Maker Fest is Back for More Hands-on Discovery


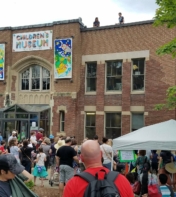
The Children’s Museum of New Hampshire is once again organizing and hosting the annual NH Maker Fest on Saturday, September 18th from 10am-3pm, inside and around the museum. Generous lead sponsors including Sprague, the Unique College Investing Plan managed by Fidelity, and Kennebunk Savings Bank have made it possible to have this year’s festival entrance be by donation. “We’re grateful to all our sponsors for helping to make this year’s festival the most accessible one yet,” shared CMNH President Jane Bard.
The NH Maker Fest is a day long festival that invites all ages to explore the creativity and ingenuity of area makers, hobbyists, artisans, performers and more. “Much like the Children’s Museum’s of NH mission, which is to actively engage families in hands-on discovery, the NH Maker Fest is a great opportunity to experience a ton of local innovation and resourcefulness all in one place,” said Neva Cole, CMNH Communications Director.
Participants in the Fest vary from year to year, and Maker applications are still being accepted. Lindsey Castellon, owner of Angry Gato Designs, is excited to participate for the first time this year, and will not only be selling her fantastical laser-cut works of art, illustrations, jewelry and more, but will also be showing guests how to make their own fabric scrap garland. Local podcaster Laura Harper will be on hand with her friends from the Creative Guts podcast, and will be inviting folks to stop by and record answers to a few of their creative questions. Recordings from the Fest may even be used in a future episode of Creative Guts!
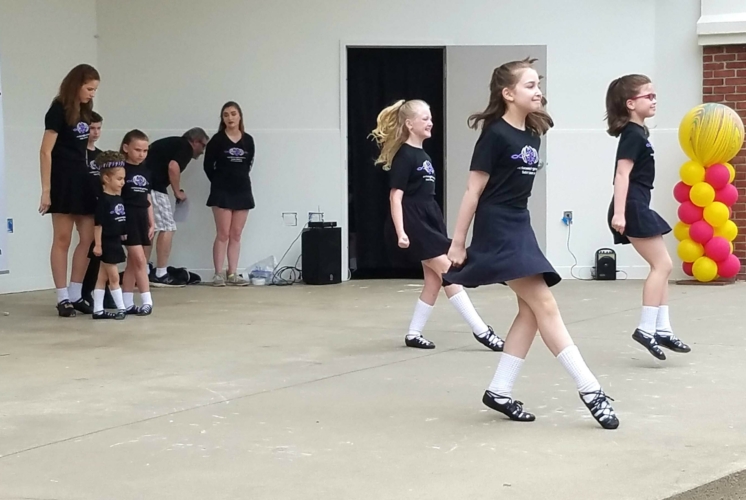
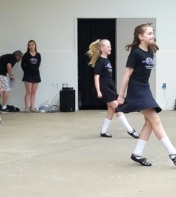
NH Maker Fest alumni will include the Maker Lab at the Dover Library, who are always popular with guests because of their creative activities, as well as the talented students of the McDonough-Grimes Irish Dance group who will be performing on the Rotary Arts Pavilion stage in front of the museum. Also back again this year is the FIRST LEGO League team from the Dover Middle School who will not only show off their robots, but help guests code and operate a robot to complete missions of their own.
Interested Makers also have the option of participating virtually through pre-recorded videos, online workshops, blogs and more. “We went totally virtual with the Fest last year, and we wanted to offer that option to people again this year since it was a lot of fun, and an easy way for people to show off their talents,” shared Cole.
Also new this year, the Fest has partnered with the Cochecho Arts Festival, organized by the Dover Chamber of Commerce. Magic Fred, a children’s magician will perform from 10-10:30am, and then The Kenney Brothers Band, a folk rock band, will perform from 3-4pm as the culmination of both the NH Maker Fest and the Cochecho Arts Festival summer concert series. Both performances will take place on the Rotary Arts Pavilion at Henry Law Park and the stage sponsor is Burns, Bryant, Cox, Rockefeller & Durkin, P.A. “We are excited to partner with the Children’s Museum of New Hampshire to provide entertainment for the NH Maker Fest,” says Greater Dover Chamber of Commerce President Margaret Joyce. “This is a natural extension of our summer-long Cochecho Arts Festival and allows us to celebrate the arts with Maker Fest attendees.”
The museum would like to thank all its NH Maker Fest sponsors including Sprague, Unique College Investing Plan Managed by Fidelity, Kennebunk Savings Bank, Albany International, Alexander Technology Group, Beswick Engineering Company, Inc., QA Cafe, The Rowley Agency, Loftware, Martel Plumbing & Heating, and NHPBS. To learn more about the Fest, to support this event, or to apply as a Maker, please visit this page.