Spooky Science: Disappearing Ghosts
Disappearing Ghosts
Materials Needed:
- Biodegradable packing peanuts (made of corn!)
- Dark colored marker
- Pipette or paintbrush
- Small cup of water
- Tray/plate/cookie sheet
Instructions - Set-up:
- Use your marker to draw ghosty faces on several biodegradable packing peanuts
- Invite your young scientist(s) to draw some faces, too!
- Place ghosts, small cup of water, and pipette on a tray, plate, or cookie sheet
Instructions - Activity:
- Explain to young scientists that today they are going to make some ghosts disappear!
- Invite them to touch the ghosts and guess what material was used to make them
- Talk about the texture, the weight, and ask if it reminds them of anything they’ve seen/touched before
- Show them how to use their pipette and tell them to carefully drip some water onto their ghosts
- What happens?!
- You can also use a paintbrush to carefully drip water
- What happens?!
- Eventually they will notice that their ghosts are shrinking and “disappearing” into a pool of water!
- Ask them what happened? How do they think that happened? Do they think the ghosts really disappeared? Where did they go?!
The Science:
Although it may have LOOKED like the ghosts were disappearing, they were actually dissolving! The packing peanuts are made of corn, which dissolves in water. If you put a handful of these packing peanuts into a jar of water and shook it, they would completely dissolve--leaving some cloudy white water behind.
Packing peanuts are traditionally made of styrofoam which takes millions of years (we think!) to biodegrade and become dirt in the earth. These packing peanuts biodegrade almost instantly, making them much more environmentally friendly--and they also make an awesome science experiment!
Bonus Activity: Monster Ice!
Can’t get your hands on biodegradable packing peanuts? No worries! Try this fun experiment instead.
Materials Needed:
- Plastic container (freezer safe)
- Water
- Googly eyes or other Halloween trinkets (spider rings, erasers, etc)
- Small cup with warm salt water
- Pipette or paintbrush
- Tray or cookie/baking sheet
- Red & yellow food coloring (optional)
Instructions - Set-up:
- The night before the activity, or several hours before, put water into your plastic container.
- Add yellow and red food coloring to make orange, if you’d like
- Put in the googly eyes or other Halloween trinkets
- Freeze!
- Place plastic container with ice* on a tray with cup of warm salt water & pipette/paintbrush
- *You might be able to get the ice out of the container, if not--start with the ice still in the container and as young scientists add water & salt, you will easily be able to get the ice out!
Instructions - Activity:
- Invite young scientists into the experiment area
- Ask them what they see!
- Encourage young scientists to use the pipette or paintbrush to drip warm salt water onto the ice and “free” the halloween trinkets
- Ask: What is happening?
- Mention that the water is warm and has salt in it--ask how they think this might help to melt the ice
- Continue adding water until the trinkets are unfrozen!
The Science:
- Salt lowers the freezing point of water. Ice melts faster when salt is added as the salt lowers the freezing point of the ice, this is known as freezing point depression. The more salt you add the lower the freezing point.
- This is why we use salt on roads in the winter to help melt the ice and make them safe!
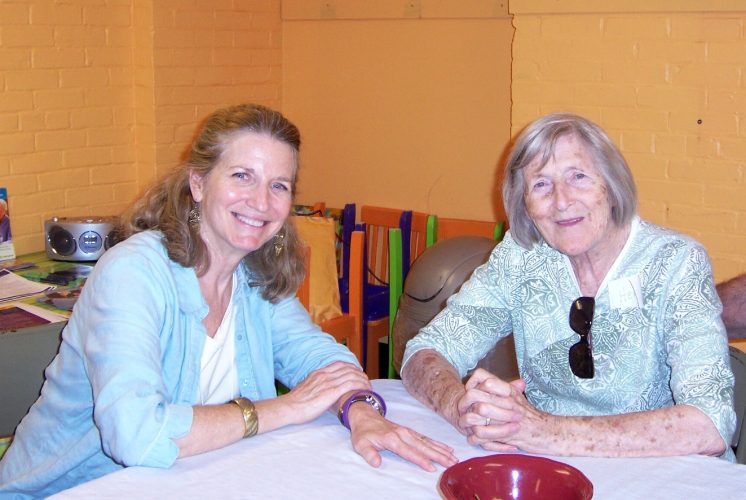
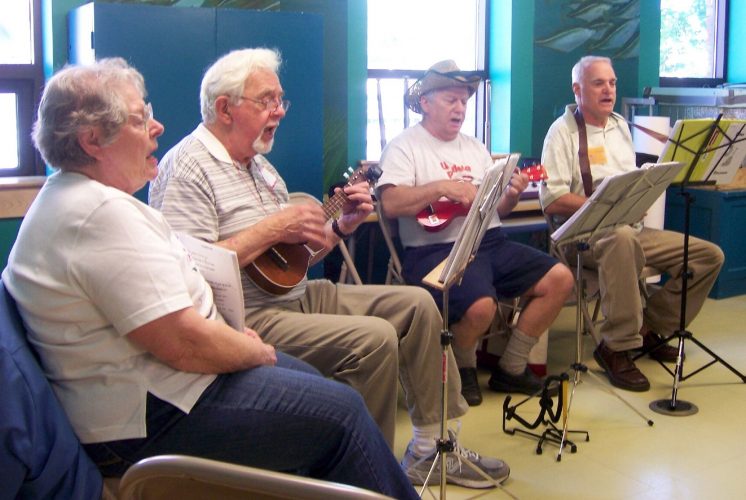
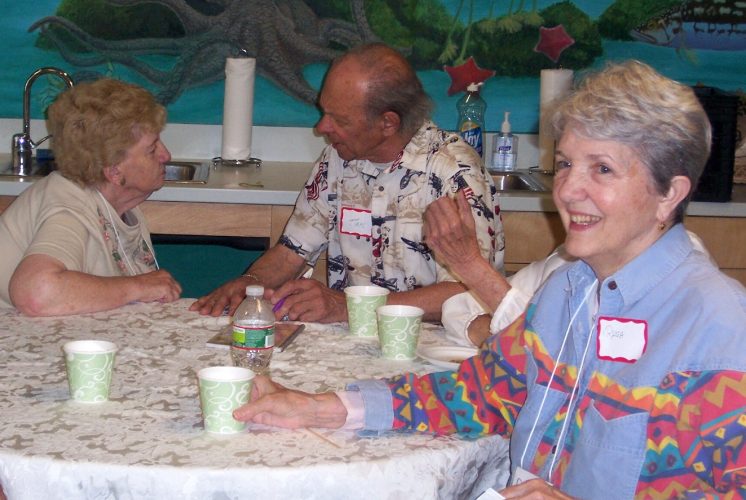
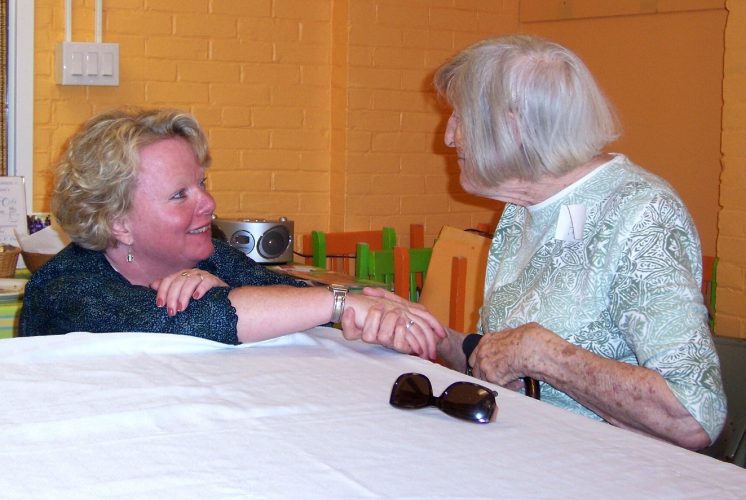
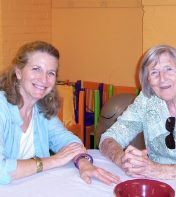
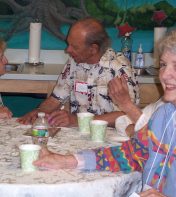
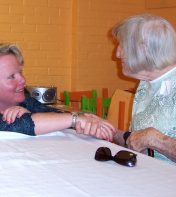
9th Anniversary of Alzheimer's Cafe

By Paula Rais, CMNH Vice President of Development and Community Engagement
paula@childrens-museum.org
In 2011, the Children's Museum of New Hampshire launched the first Alzheimer's Cafe on America’s east coast. Alzheimer’s Cafés provide a safe, supportive and judgment-free setting for people living with dementia and their loved ones to enjoy an outing in the community, socialize, and make new friends. This program exemplifies the museum’s goal of working with communities to meet existing needs and demonstrates an innovative, concrete way to provide community based solutions to these problems. The Museum’s vibrant inter-generational environment proved to be an ideal setting and the Café became very popular. Dozens of similar programs sprouted up in communities around New England modeled after the Museum’s program.
At the Café each month, we share stories and tell jokes, listen to musical performances and interesting presentations, or celebrate holidays and birthdays. Some attendees became friends and socialized outside the monthly Cafe gatherings. According to Dr. Lokvig, the founder of the first Alzheimer’s Café in the USA, “In spite of the name ‘Alzheimer’s Café’, we leave the disease at the door and celebrate the person beyond dementia. The Café is a chance for everyone to step out of their daily roles and share a positive experience in a supportive environment.”
Since Covid-19 struck in March 2020, our Café has not been able to meet. I know that our Café families are missing each other's companionship and support, and we miss seeing them at the Museum. When it is deemed safe for our staff and visitors, we will explore options for resuming this important program. Please contact me if you would like more information about the Alzheimer's Cafe or want to be on our email list to receive updates.
In the meantime, allow me to honor the occasion of the 9th anniversary of the Alzheimer's Cafe at the Children's Museum, the many families who shared their lives with us, and the generous volunteers, performers, and funders who helped make it all possible.
FoodWorks: Jack-o-lantern Mini Pizzas
Happy Fall! This month for FoodWorks we show you how to make an easy lunch or hearty afterschool snack: English Muffin Pizzas! What’s great about this recipe, is that older children can safely make them independently using a toaster oven. Adding the jack-o-lantern face makes this snack fun and creative- it may even get children to try toppings they may not otherwise try! The FoodWorks program is a partnership between the museum and Hannaford supermarkets to provide healthy, family friendly recipe ideas and activities.
Ingredients:
- English Muffins- try whole wheat or whatever kind your family prefers
- Sliced cheese - or you can use shredded cheese- we chose orange cheese!
- Pizza sauce, your favorite tomato sauce
- Optional toppings: black olives, green or red peppers, pepperoni
You will also need: a cup or round cookie cutter, paring knife, and a spoon
Recipe:
This is almost too easy to call a recipe, but we will walk you through making the jack-o-lantern faces! Children can help assemble these, and they cook quickly in a toaster oven.
- Cut the english muffins in half
- Use a spoon to add your favorite pasta or pizza sauce to the english muffins
- Take one slice or orange cheese, and use a cup to press into it a circular shape. You can also use a round cookie cutter for this step if you have one
- This step needs some help from a grown up: carefully cute triangles for eyes, and a mouth shape out of the cheese
- Alternatively: cut up some ingredients ahead of time, like peppers, olives, and pepperoni, and children can create the jack-o-lantern face on their own pizzas using either sliced or shredded cheese
- Bake in the oven at 375 degrees for 10-12 minutes, or cook in the toaster oven for about 10 minutes (toaster oven settings vary, so it’s a good idea to check and be sure they do not overcook)
Enjoy!
Alternatives and Variations:
Here are some links to recipes for Jack-O-Lantern Pizzas using various methods and ingredients:
- Pumpkin Pizza Recipe From Pillsbury -this recipe uses a similar method to ours, but they use pepperoni to make the face, and add basil for a pumpkin stem
- Jack-O-Lantern Pizzas From Taste of Home -this recipe adds some ground beef for protein, and they use shredded cheese and olives and peppers to make the faces
- Jack-o-lantern Pizzas Using Pitas From Land-o-Lakes - This recipe uses pitas for a base instead of english muffins, which is a good option for anyone who does not like english muffins.
- If your family does not prefer english muffins, try using pitas like the recipe above, or another pre-made crust that would be quick and easy to assemble.
- Some of the recipes show ideas to make a cat, vampire, or a monster face on your pizzas. These are so fun for Halloween- Enjoy!
Spooky Sparks
by Meredith Brustlin, CMNH Educator
Materials Needed:
- Oven safe dish - reusable or disposable aluminum
- Steel wool
- 9V battery
- Jug of water - just in case!
Instructions & Safety:
- Since this activity does produce smoke, you may want to set-up outside. Just be sure if you do this experiment outside that it is not a windy day.
- I did this experiment inside my house several times and there was not enough smoke to set off any smoke detectors! HOWEVER I had coarse grade steel wool so the circuits & smoke were far less significant. If you have FINE grade steel wool, do this experiment outside.
- If you have young scientists--do this experiment as a demonstration (“I’m going to do it, and you get to watch!”)
- If your scientists are older, they can do this experiment but make sure they are closely supervised.
- The steel wool produces sparks & fire
- The 9V battery will eventually get fairly warm to the touch.
Set-up:
- Pull apart your steel wool so that it is in a very thin layer
- Place the steel wool into your oven safe dish or container
- Place the battery and jug of water nearby.
Activity:
- Take time at the beginning of this experiment--whether you are doing it as a demonstration or young scientists are participating--to discuss safety.
- Ask scientists what they see. Invite them to feel the steel wool. What does it feel like? Does it remind them of anything?
- Explain that today you are going to make spooky sparks by creating circuits within the steel wool.
- Use the battery to gently touch down on the steel wool---watch as sparks fly through the steel wool creating a chemical reaction!
- Keep creating circuits! Eventually you will “use up” all the steel wool and the circuits won’t work anymore. Also be conscious of the battery warming up--it’s working hard!
The Science:
We are seeing a chemical reaction take place in this experiment, Anytime something burns, we are seeing a chemical reaction! This type of chemical reaction is called a combustion reaction.
You are seeing the steel wool react with oxygen and in this case it is forming iron oxide.
We were also seeing circuits at work! When both battery terminals touch the steel wool, the electrons from the battery move rapidly through the steel wool and make a complete circuit. This electrical current is heating up the wire (to ~700 degrees!) and this heat causes the iron to react with the oxygen surrounding the little strands of steel wool. This reaction is what causes the sparks (homeschoolscientist.com).
Bonus Activity: Fizzy Pumpkins
Materials Needed:
- Baking Soda
- Water
- Red & yellow food coloring
- Small piece of cardboard
- Tray or cookie sheet/pan
- Pipette or paintbrush
- Small cup of vinegar
Set-up:
- Make your fizzy pumpkin!
- Measure out about ½ a cup of baking soda into a bowl
- Slooooowly add water until the baking soda comes together to form a moldable paste
- Add yellow and red food coloring to make orange and mix together
- Use your hands to shape the baking soda into a ball
- Push in the piece of cardboard in the top to look like the stem of a pumpkin
- **You can either make your pumpkin immediately before doing your experiment, or make it the night/several hours before**
- If you make it right before your pumpkin will be “mushy” but still hold its shape
- If you make it hours before doing the experiment, the baking soda will dry out and become hard as a rock!
To set-up your experiment area, put the pumpkin on a plate or tray and set the cup of vinegar and pipette/paintbrush nearby.
Activity:
- Invite young scientists into the experiment area
- Ask them what they see!
- If you’d like, you can tell them they can carefully touch the pumpkin with one finger and guess how it was made/what material was used to make it.
- Introduce the vinegar and pipette/paintbrush and tell young scientists to carefully drip some vinegar onto their pumpkin
- What happens?!
- Keep playing until the pumpkin turns into pumpkin mush!
The Science:
This is a classic acid and base experiment. When vinegar (an acid) interacts with baking soda (a base) we get a chemical reaction. In this case we’re producing a gas (carbon dioxide) and lots of fun fizzing and bubbles!
Spooky Science: Frankenstein's Hand and Fizzy Pumpkin Art
by Colie Haahr, CMNH Educator
In this Spooky Science Video we make Frankenstein's "hand" come to life with a simple chemical reaction! We also demonstrated an art project using the same materials to make fizzy pumpkin art. Most of the materials for this project can be found at home, and though it's a bit messy, these are both activities that children can try on their own with just little help from a grown-up.
Frankenstein's Hand Experiment
Materials needed:
- Cup
- Disposable glove
- Baking soda
- Lemon juice or vinegar
- Tray or pan
- Scoop or spoon
Set up:
Put all the materials on a tray or another surface that can get wet. This is a good activity to try outside for an easier clean up. The ingredients we are using are actually used for cleaning, which means they should not stain surfaces. A tray is best if you have one. If desired you can pour the lemon juice or vinegar into the cup ahead of time, or children can help with this step.
Experiment:
- Place the cup on the tray, and fill it about ¼ of the way up with lemon juice or vinegar- this experiment works with either one
- Use a spoon to place a few scoops of baking soda into the glove
- Shake the glove so that the baking soda moves down to the fingertips
- Carefully place the glove on top of the cup by stretching the elastic opening of the glove around the mouth of the cup- the fingertips should be hanging down still
- Be sure there’s a tight seal between the glove and cup- if not, hold the glove in place
- Tip the glove upright so that the baking soda drops down from the fingertips into the cup
- Watch the glove! It should start to inflate quickly as the baking soda reacts with the lemon juice inside the cup
Optional Alternative way to do this experiment:
If you do not have a glove handy you can also do this same experiment with a balloon and a plastic bottle. First, draw a face on the balloon, so that when it expands you will have a funny face or monster face on your project. The rest of the steps are the same, except you are placing the baking soda in the balloon, and carefully attaching it to the top of the water bottle. The reaction will be the same as well- the balloon will magically inflate on its own! The Children’s Museum of Indianapolis shared a video of this version of the experiment: Monster Balloon Experiment. Another resource for this experiment comes from Scholastic: Fizzy Balloon Experiment
How does it work?
Lemon juice is acidic and baking soda is a base, and when acids and bases mix together, they fizz up! You created a chemical reaction inside the cup: you mixed together a liquid and a solid, and released a gas: carbon dioxide. When you add the baking soda to the lemon juice the gas starts to move out of the cup, but the glove is blocking it from escaping. The glove inflates from the gas, and will stay inflated while the reaction continues to happen. This experiment is fun because you can “see” the gas that’s created by trapping it inside the glove. Usually, we can’t see the gas that is released from a baking soda and vinegar (or lemon juice) experiment.
Fizzy Pumpkin Art
Materials:
- Tray or placemat to work on
- Orange food coloring or liquid watercolor (mix yellow and red to make orange if needed)
- Lemon juice or vinegar
- Baking soda
- Pipette or spoon
- Pumpkin template- or draw your own with a permanent marker- works best on cardstock. Here are a few free printable pumpkin templates from FirstPallete.com: Medium Sized Pumpkin Template, Large Pumpkin Template
Set Up:
Place the pumpkin template on the tray or work surface. If you would like, use a permanent marker to draw a jack-o-lantern face on the pumpkin. Pour the lemon juice or vinegar into a cup and add the orange food coloring. If you do not have orange, mix red and yellow food coloring together to make it. Keep in mind that the color will become lighter when it mixes with the white baking soda. Spread a light layer of baking soda over the pumpkin image.
Activity Instructions:
- Once everything is set up, use the pipette to add lemon juice to the pumpkin picture
- You should see the baking soda on the pumpkin starting to fizz up! Continue to add lemon juice or vinegar until the fizzing stops
- Let your project dry, and it will become a nice art project. If there is too much liquid on the picture, either use the pipette to remove some, or gently shake it off
- Once dry, you can gently brush off any excess baking soda that is left.
- This activity uses the same ingredients as the experiment, and the chemical reaction is the same. The only difference is that we added some color to the lemon juice or vinegar, so just keep in mind that this will need more clean up, and that food coloring may stain surfaces or clothing.
Spooky Science: Bat Rockets
by Colie Haahr, CMNH Educator
We did a mini rocket experiment for this Spooky Science video, and made a bat straw rocket. You can try both at home! For the mini bat rocket, it's important to have supervision and assistance from a grown up. This experiment uses medicine, and children should not try this without help from a grown up.
Bat Rocket Experiment:
Materials needed:
- Alka seltzer or similar effervescent medicine
- A film canister with a tight fitting lid
- Water
- Optional: a bat to add to your rocket. We used a laminated picture in the video
Set up:
Set up outside or use a tray indoors in an area that's easy to clean up
Experiment:
This experiment happens quickly! So make sure all eyes are on the rocket once the ingredients are inside.
Break off a piece of the alka seltzer and place it inside the film canister. Add water filling the container less than half way. Quickly replace the lid of the canister, and flip it over so that the lid is on the ground (or tray). Wait less than a minute, and the canister will launch into the air!
How does it work?
The alka seltzer mixes with water and creates bubbles. Another way to describe it is that a solid and a liquid mix together and create a gas. In the small canister there is only so much space for the water and the bubbles to fit, so the pressure from the bubbles pushes the canister up into the air! The bubbles are carbon dioxide gas, and as the gas is trying to escape and has nowhere to go, it pushes the lid off of the canister. Since the canister was placed upside down, the canister flies up into the air rather than the lid just flying off (that will happen if the canister is placed right side up!). This experiment is similar to a baking soda and vinegar experiment, and that's because some of the same ingredients are in the alka seltzer- citric acid and sodium bicarbonate.
Bat Straw Rocket Activity:
For a less messy version of bat rocket fun, try making a bat straw rocket!
Materials needed:
- Cardstock
- Bat template
- Pipette
- Tape
- Scissors
- Straw
Instructions:
- First, print the bat template on the cardstock, or use a permanent marker to draw a bat
- Color the bat in with markers or crayons, and cut it out
- Cut a pipette so that the larger end can be used for the rocket (the part you squeeze)
- Tape the pipette piece onto the back of the bat cut out
- Place the pipette piece onto a straw- this can be a reusable straw, paper straw, or plastic straw
- Blow into the straw with is angles slightly upward- the bat should "fly" off of the straw
How does it work?
The pipette piece is closed off at the top, so when you blow into the straw, the air has nowhere to go. The pressure from blowing into the straw makes the bat fly off the straw, and go through the air for a bit!
We first learned about this activity from Bug and Buddy, and they have a free printable bat template that can be used for this project. There are also some great pictures of the process to make the rockets, and a video. See the link in the reference section below! This activity involves pressure and forces similar to the bat rocket experiment, but it is less messy and can be tried over and over again. Have fun!
References:
https://www.imaginationstationtoledo.org/education-resources/diy-activities/alka-seltzer-rockets/
Everyone Counts!
By Paula Rais, CMNH VP of Development and Community Engagement
Once every 10 years, the US Constitution mandates that every person in the United States is counted. Census data guide how more than $675 billion of federal funding is distributed to states and communities for schools and education, healthcare and services for families, children and older adults. The results of the census also inform funding decisions for programs like Head Start, SNAP, and Medicaid. Young children are often undercounted, which can affect important programs in your community.
Make sure you and your family get counted! Find out how here >>
The Census Bureau is required by law to protect your information; so all your answers are confidential and private.
FoodWorks - Fall Harvest Snacks Featuring Apples
by Colie Haahr, CMNH Educator
September is a great time of year to make the most of the summer harvest, and to start enjoying classic fall flavors. For the September Food Works recipes, we tried two different kid-friendly apple recipes. The Food Works program is a partnership between Hannaford Supermarkets and the Children’s Museum of New Hampshire that allows us to share healthy, family friendly recipes!
Today we are sharing two recipes for Fall treats: Apple “Donuts” and Healthy Caramel Yogurt Dip. Both recipes are easy to make, and are perfect for making the most of healthy and tasty fall apples! The caramel yogurt dips tastes so much like real caramel, and it’s made from yogurt with less sugar and fat than a typical caramel dip. The apple donuts allow kids to choose their own toppings for apples, and can add a few other food groups and some protein to a healthy after school snack.
Both of these recipes allow kids to take part in creating them, but it is helpful if a grownup does most of the prep work, especially cutting up the apples. For the Apple “Donuts” you will need apples, yogurt or nut butter, and various toppings such as fruit, nuts, and granola. For the Caramel Yogurt Dip you will need yogurt, maple syrup, brown sugar, salt and vanilla extract.
APPLE “DONUTS*
**note, these are NOT donuts, and you can always opt to call them something else if this will cause confusion and/or require you to provide real donuts out of thin air! We have also seen these called “apple cookies,” but this could create a similar problem with kids! Apple Frisbees?? You decide on the best name!!
- Core apples, and cut into slices so that the shape is similar to a donut with a hole in the middle
- Prep toppings ahead: blueberries, raspberries, chocolate chips, granola, nuts, and set up for kids to portion out
- Prep yogurt for kids to spread with a spoon or spatula
- Use the yogurt to “frost” the apple donut. You can also use a nut butter of your choice, or both
- Add the toppings to the apple donut, and enjoy! These can be stored in the fridge, but are best eaten fresh
A variety of other ideas for this recipe from the Food Network: https://www.foodnetwork.com/recipes/apple-donuts-3838711
HEALTHY CARAMEL YOGURT DIP
(Makes about 1 cup)
Ingredients:
One container yogurt (We used So Delicious coconut milk yogurt) (170g)
1/8 tsp salt
2 tbsp pure maple syrup
¼ cup brown sugar
1 tsp pure vanilla extract
- Put maple syrup, salt and brown sugar in a microwave safe dish and microwave on high in 10-second intervals until brown sugar starts to dissolve (If you do not have a microwave, heat in a small saucepan until sugar dissolves—or you can skip this step and just add the additional ingredients!)
- Stir in vanilla extract and yogurt
- Allow to cool
- This will get thicker if you leave it in the fridge overnight
- Slice apples to dip in the caramel dip and enjoy!
- Store leftovers in the fridge for up to four days.
Original Source: http://chocolatecoveredkatie.com